
What is Proactive Hunting?
Advanced attacks like the SolarWinds backdoor and Pay2KEY are on the rise, while preventive solutions have failed to detect them. It’s critical to assume breach and search for any traces of malicious code running in your network even without getting an alert.
It’s not too late to check if your network is compromised. These attacks have dwelled in some networks for weeks up to months before causing any damage.
Intezer can help you conduct immediate and/or periodical Proactive Hunting operations, by scanning in-memory for any malicious code across all your endpoints.
Advantages
-
- Be proactive instead of reactive. Don’t sit around and wait for an alert from your EDR. Scanning your endpoints in memory for malicious code is something you should do on a regular basis to stay ahead of attacks.
-
- Detect sophisticated attacks that might be active in your organization. Proactively detect advanced threats running in-memory including code injections, packed and multi-stage malware. Most endpoint protection solutions do not actively scan the memory which is critical for identifying the execution of malicious code.
-
- Efficient, proactive operations without operational overhead.
Periodic and on-demand scans of your IT environment do not require a permanent agent and can complement your existing endpoint protection solution.
- Efficient, proactive operations without operational overhead.
What Does Proactive Hunting Look Like with Intezer?
Intezer’s Proactive Hunting is done by running a lightweight scanner that detects traces of malicious code in memory—a standalone executable that doesn’t require installation. The memory scan usually takes less than 10 minutes and can be done on thousands of endpoints simultaneously. Results are available through Intezer's web console.
Step 1: Create a Trusted Baseline (Optional)
During the analysis, code from memory is genetically inspected and compared against Intezer’s global Genome Database and your own private database. This step creates a trusted baseline for the proactive hunting operation.
It is possible to skip this step as Intezer will detect any malicious code. If you plan to conduct these hunting operations frequently, we recommend creating a genetic trusted baseline of your code to save future investigation time. Otherwise some of your proprietary code might be classified as unknown.
Scan the first endpoint.
Preferably this should be done on a clean image.
Download the scanner and run it on the endpoint.
Review the scan results.
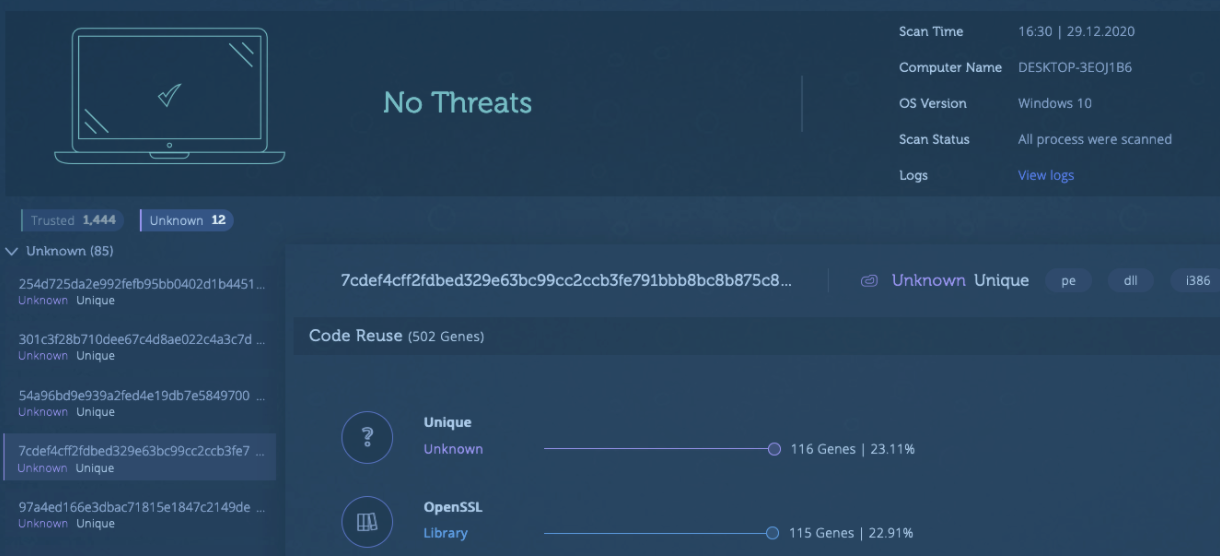
Go to Intezer web console to find your scan results. The system will notify you if any threats were found during this stage. If the scanned endpoint is clean, you will see “No Threats” with various trusted modules and a few unknown modules. The unknown modules are likely trusted software used in your organization that isn’t recognized in Intezer’s global database. This is why we recommend creating a trusted baseline of your code in Step 1 as it will classify this code as trusted for future scans.
Review these findings and make sure you recognize the software. Our experts can assist you during this process.
Acquit endpoint.
Add the unknown software to your organizational database, click on “Acquit endpoint”, and it won’t be flagged in the next scans as unknown.

Step 2: Scan Endpoints
Define your targets.
Define a list of endpoints you want to cover as part of the proactive hunting operation. You can start with a group of the most sensitive endpoints, any subset of your network, or the entire network.
Scan the selected endpoints.
Make sure the memory scanner executable file is accessible from the endpoints. Then, run a command to trigger the scan. This can be done in several ways, depending on your network architecture. We recommend using MDM (SCCM, Ansible, Puppet, Chef, Kace, JumpCloud and Automox).
To trigger the scan, execute the following command on the endpoints Scanner.exe -k <api_key>
Please note: The executable runs in user mode and with administrative privileges. The scanner only collects executable code, not documents or any other data that is not executable code.
Step 3: Review the Results
Genetic Analysis.
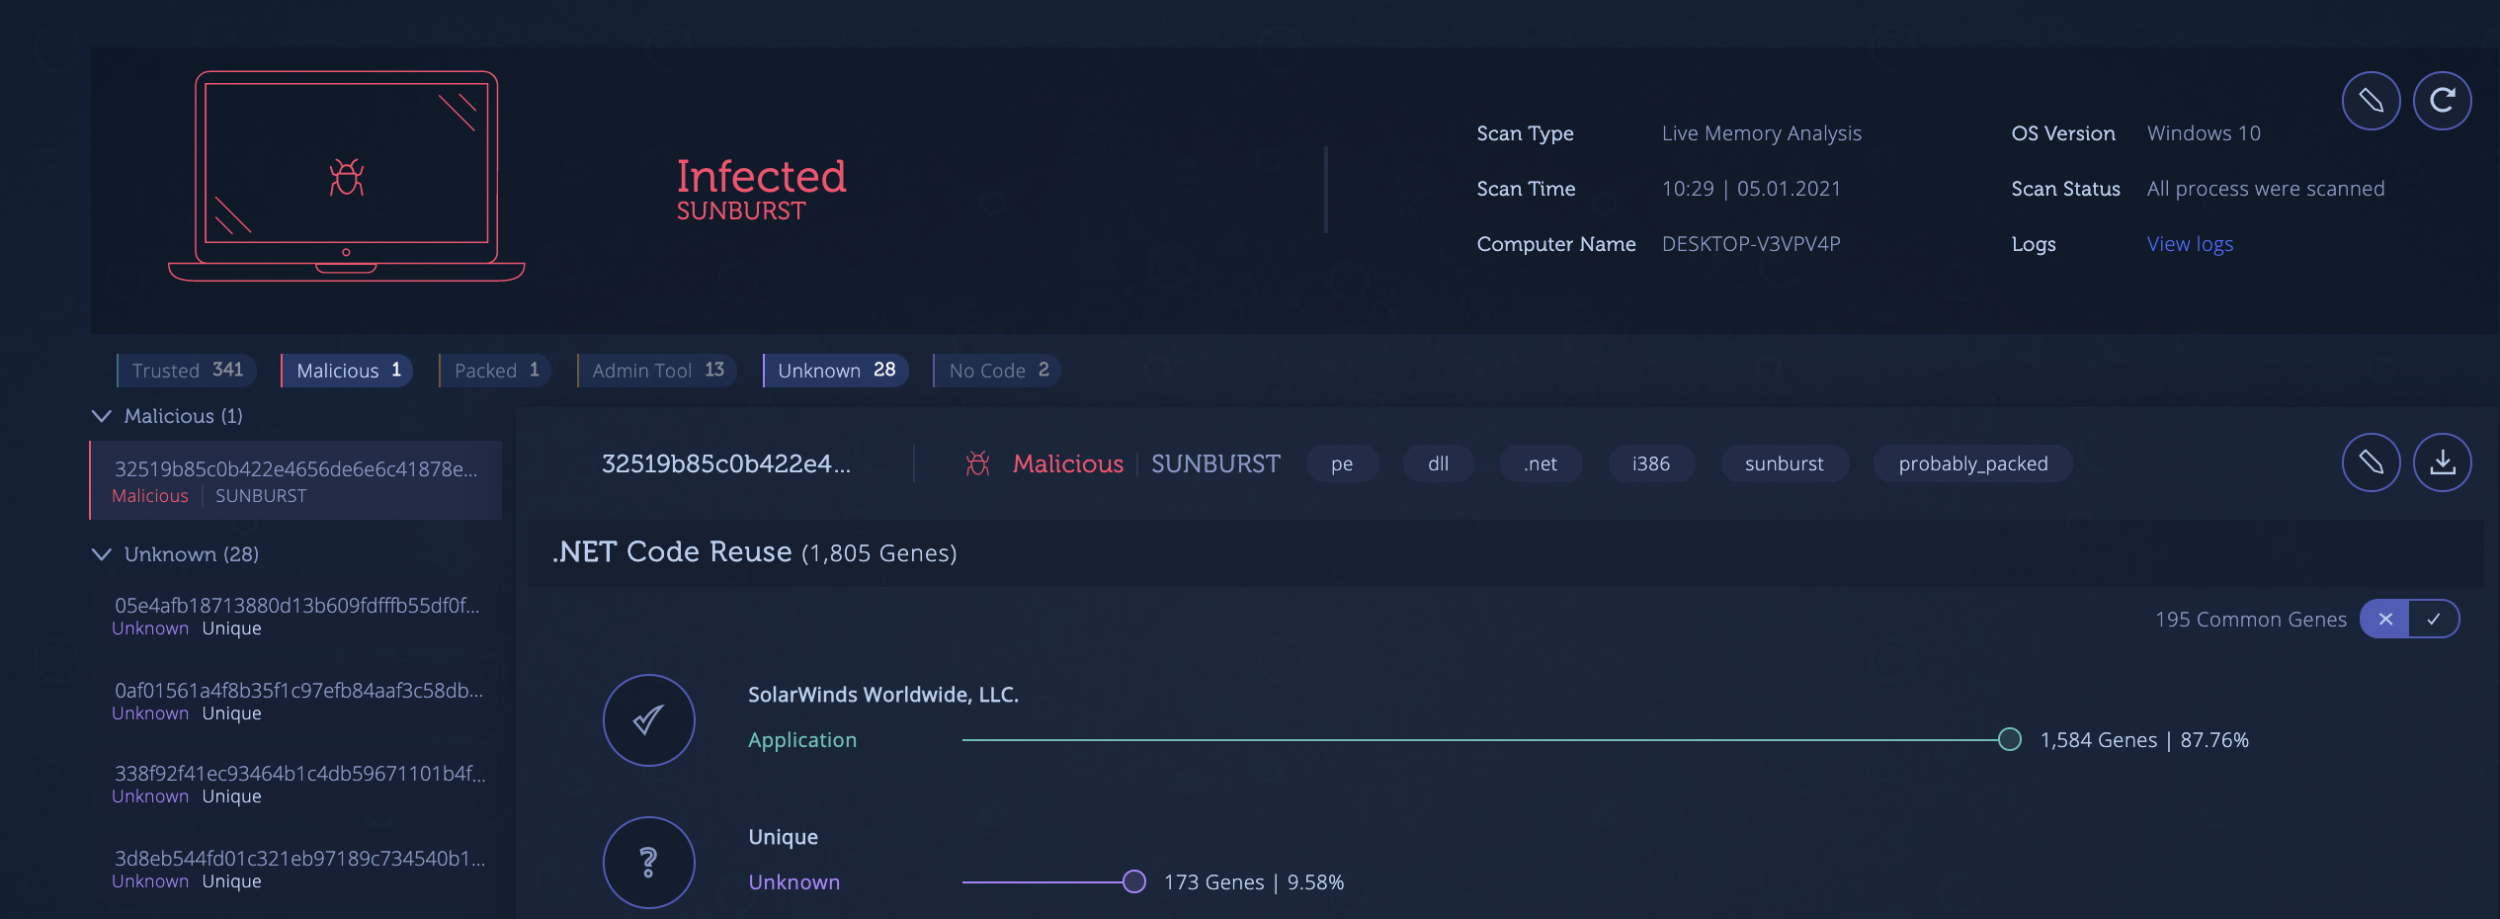
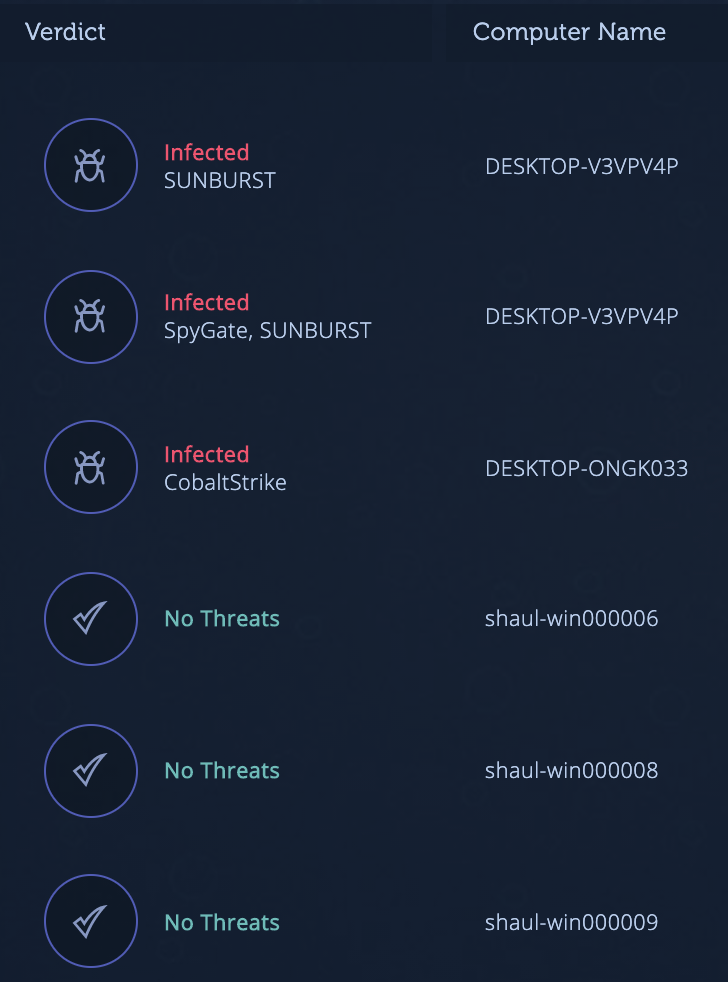
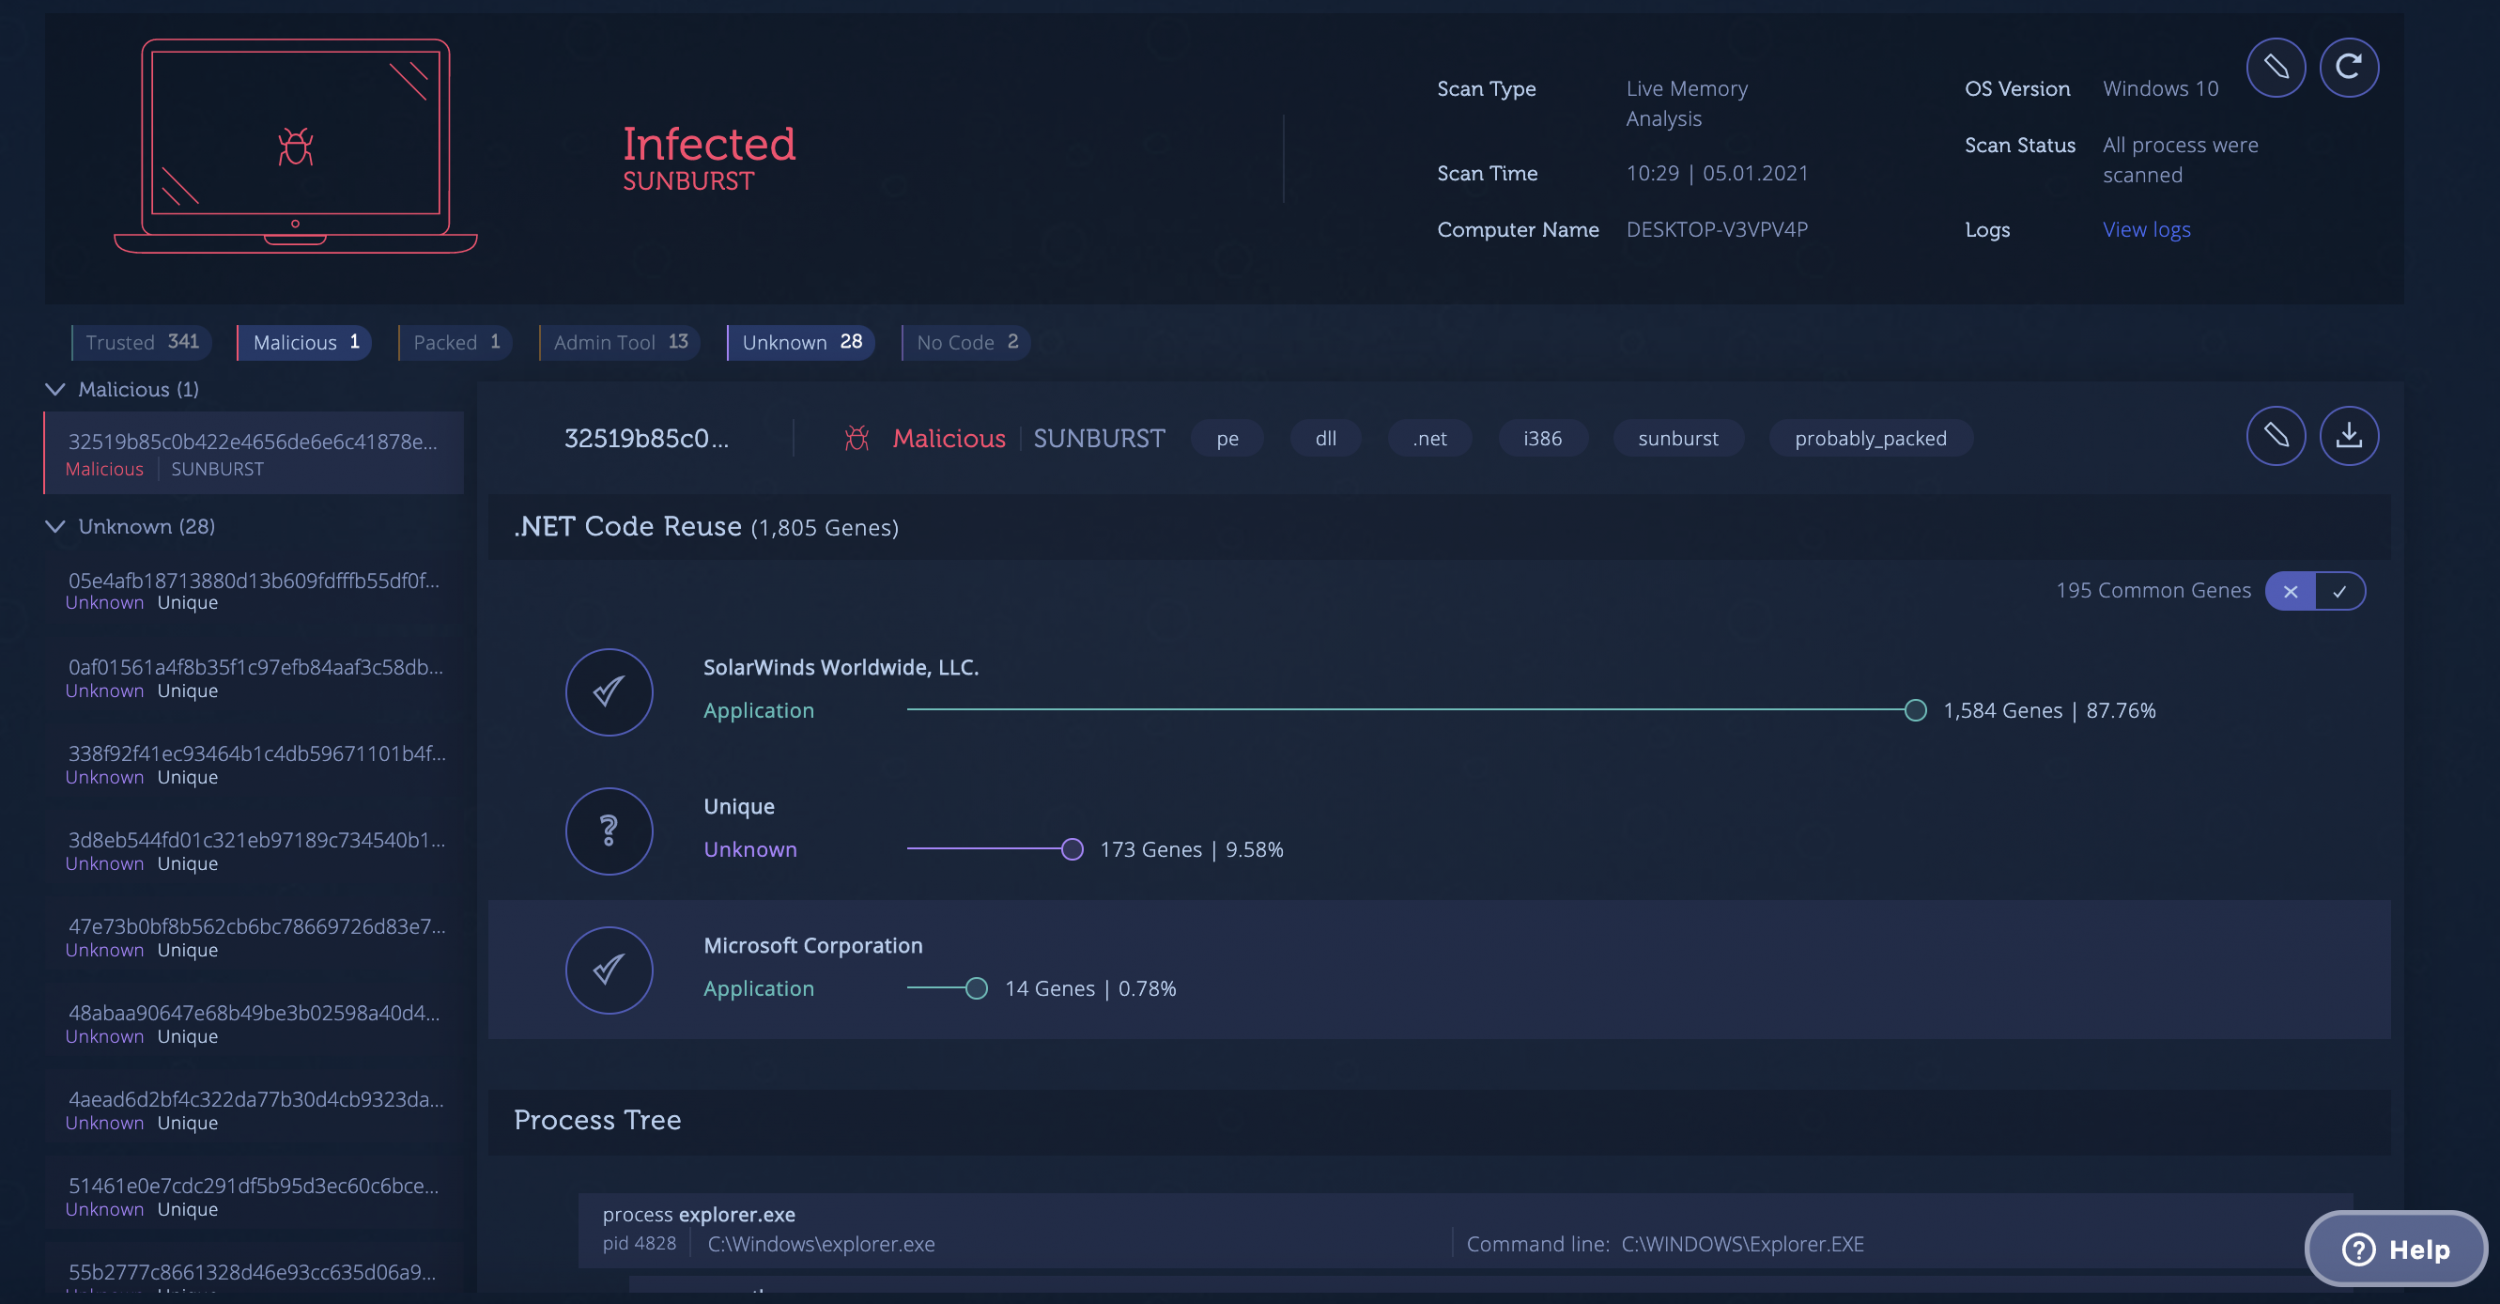
Code from memory is genetically analyzed and compared against Intezer’s global and the organization’s database. Once the automated analysis is complete, you can review the results. If traces of malicious code are found in-memory, the endpoints will be marked as “Infected”. All the data accessible in the console is also available through an API.
Investigate and respond.
Dive into the “Infected” endpoints. The report reveals information about the malicious code found, including the specific threat, process tree and other insights that can help you determine the right response plan to recover. As always, our experts can assist with incident response and investigations.
Advanced: Hunt for unknown threats.
In addition to finding malicious code traces, each scan also finds unknown code. Dive into your scans, even when no threats are found, to review the unknown code. Software that isn’t found in your trusted baseline or the global trusted database is marked as unknown. If the unknown code is legitimate software you use, acquit the code to strengthen your trusted baseline for future scans.
Architecture
The scanner collects code artifacts from memory. Those modules are sent to Intezer’s cloud environment for analysis. There are several ways to send the artifacts to Intezer.
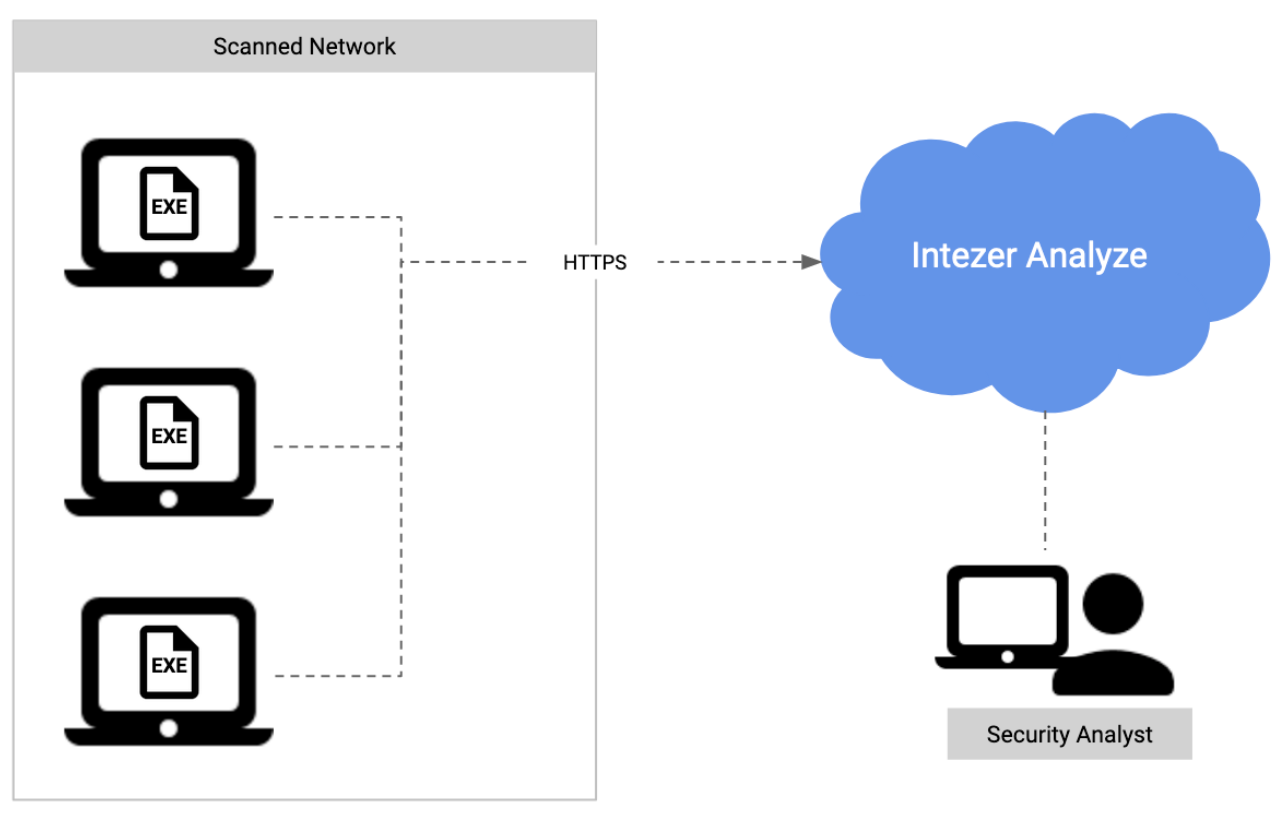
Option 1: Direct Connection to Intezer Analyze
The simplest way to conduct a threat hunting operation is when the endpoints have direct access to the internet, since it doesn’t require any additional configuration.
Make sure the endpoints can access analyze.intezer.com in port 443 (HTTPS).
This is also suitable for customers with Intezer Analyze deployed on-premise; endpoints should have access to the local Intezer Analyze. If you run the scan against an on-premise version of Intezer Analyze, use the -u configuration flag to specify the service address: Scanner.exe -k <api_key>
-u https://<intezer_server>
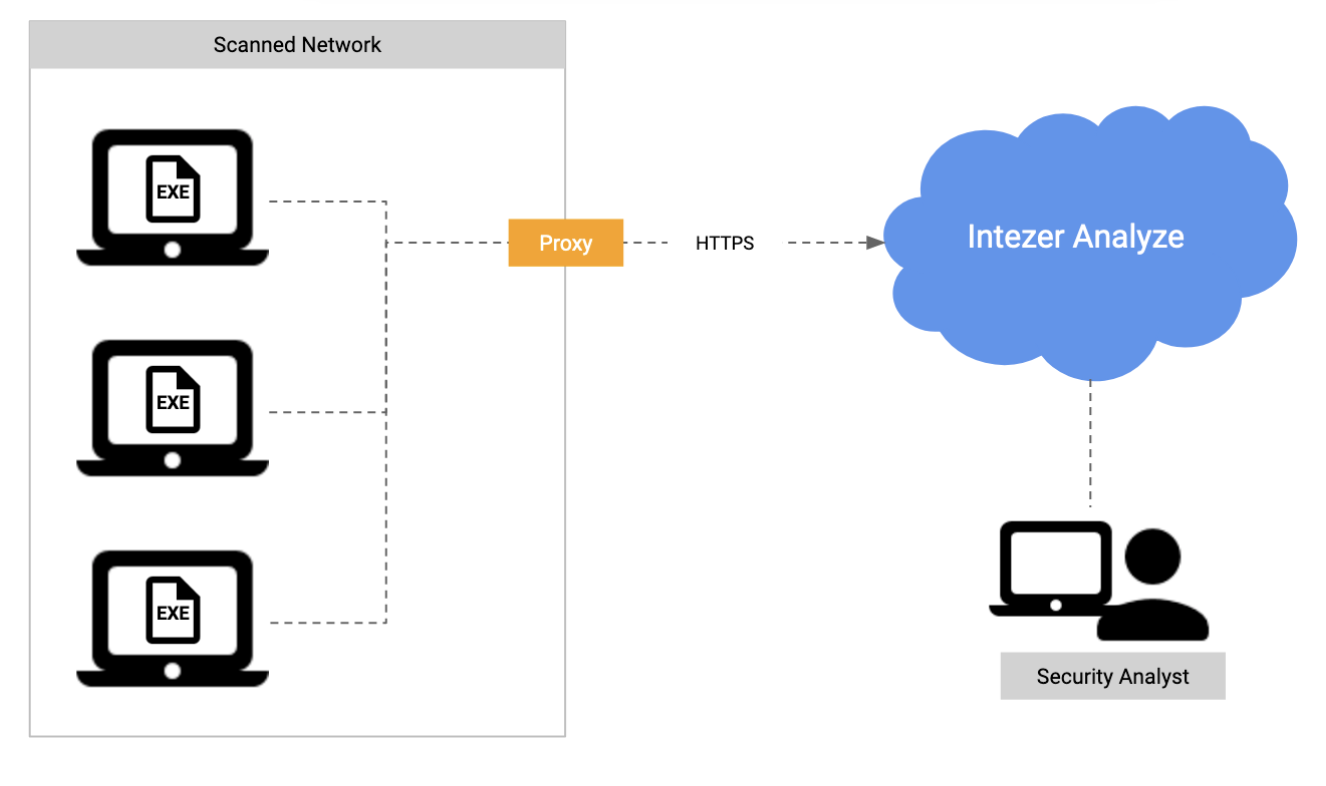
Option 2: Proxy Connection to Intezer Analyze
The scan can also send information via a proxy server. In that scenario, endpoints should have access to the internal proxy server. Use the -p configuration to specify the proxy address when running the scanner: Scanner.exe -k <api_key> -p <proxy_address>
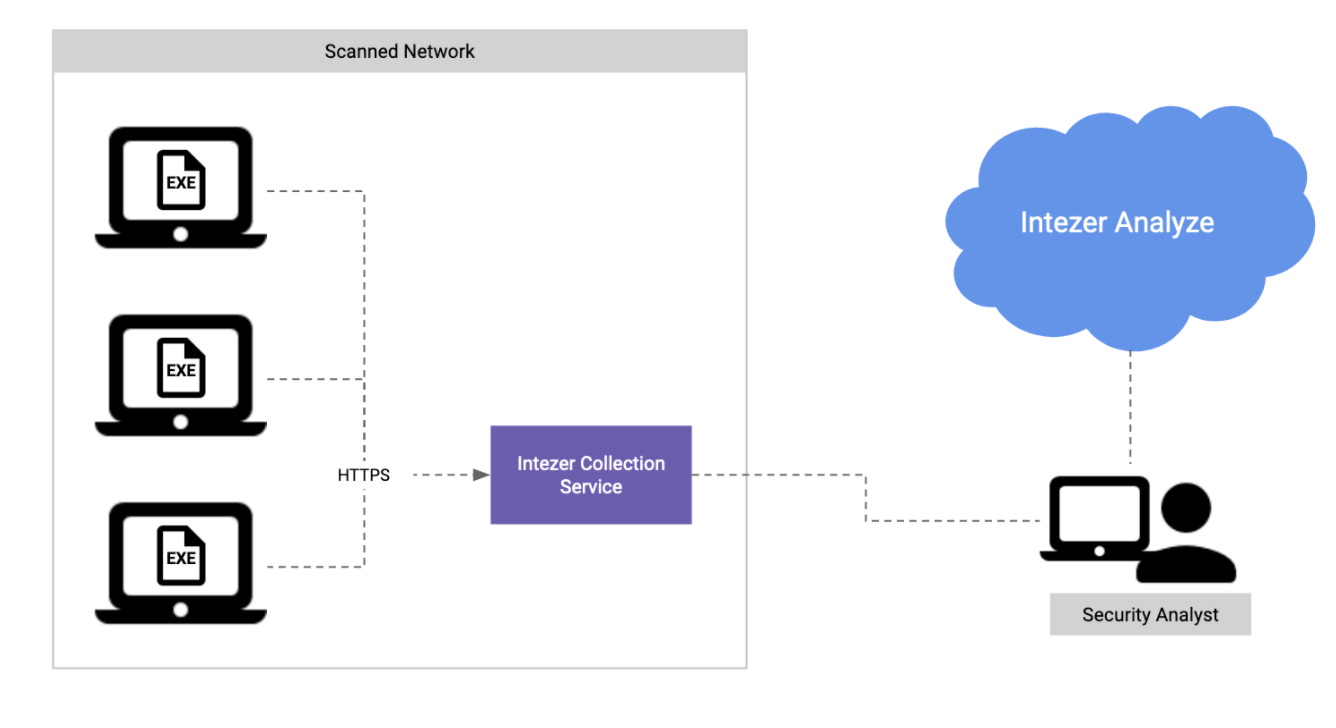
Option 3: Collecting Using a Local Service
When the endpoints can’t access Intezer Analyze, you can set up a collection service in your private network. All endpoints should have access to that service, and the data is stored locally on that server. When running the scan, use the -u configuration flag to specify the service address: Scanner.exe -k <api_key> -u https://<local_server>
After the data is collected, you can fetch the data to a location with internet access, and run a job to upload the data to Intezer Analyze for analysis.
Intezer
Count on Intezer AI SOC to triage, investigate and respond to every alert at unmatched speed and accuracy.
In this article
Share article
Proactive Threat Hunting with Intezer
.png)
AI SOC
AI
Company News
5 minutes
Loop engineering comes to the SOC: Introducing the Intezer Org Brain
Organizational context in an AI SOC is table stakes. Org Brain is very different. It learns, it recalls, it fetches what it's missing, and it gets sharper with every alert it touches, all autonomously.

Detection Engineering
AI SOC
8 minutes
Detection engineering in the AI era
AI is lowering the barrier to sophisticated attacks. Explore why detection engineering matters and where most programs fall short.

AI SOC
CISO
Company News
Introducing Custom Agents: Automate your SOC, your way
Add your own agents and automations on top of the ones Intezer runs out of the box, take more of the manual work off your analysts, and tailor AI SOC to the way your team actually operates.